Acumen Technical Guides
Intune Guide
This guide will go over how ti install Acumen’s Add-In Toolset on a 64-Bit Windows System via Microsoft Intune
1. Create .INTUNEWIN file
To deploy add-in to the MS Intune need to create .intunewin file from .msi add-in installation file. Follow the next steps:
1.1. Download the prep tool to convert .msi to .intunewin:
Link: https://github.com/microsoft/Microsoft-Win32-Content-Prep- Tool/blob/master/IntuneWinAppUtil.exe
1.2. Run IntuneWinAppUtil.exe and specify all needed information. On the last step you can just click Enter or N. See the image below:
1.3. File
<packageName>.intunewinfile will be created under the output folder.
2. Deployment to MS Intune
Once you created .intunewin file from Acumen Add-In .msi installer, you can deploy it to MS Intune.
2.1. Go to the Microsoft Endpoint Manager.
Link: https://endpoint.microsoft.com/
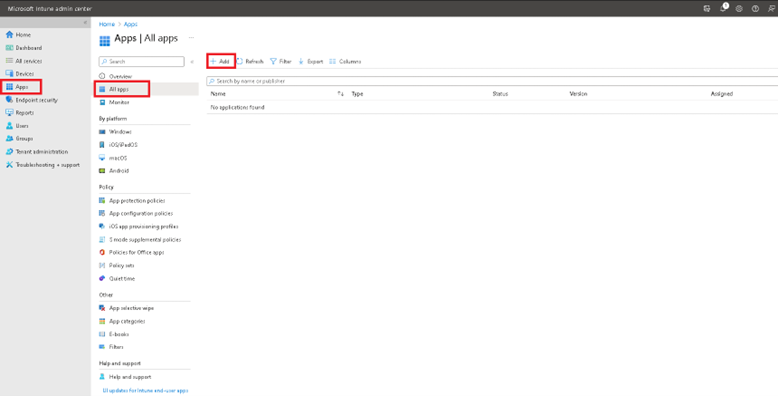
2.2. Go to the Apps => All apps => Add.
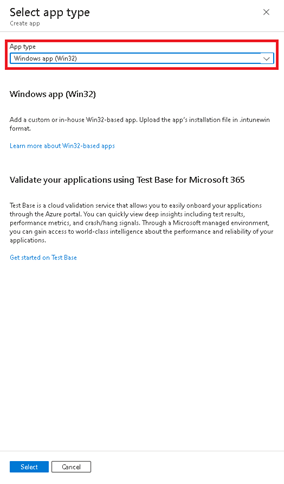
2.3. Select Win32 App.
2.4. Add created .intunewin file to the App package file.
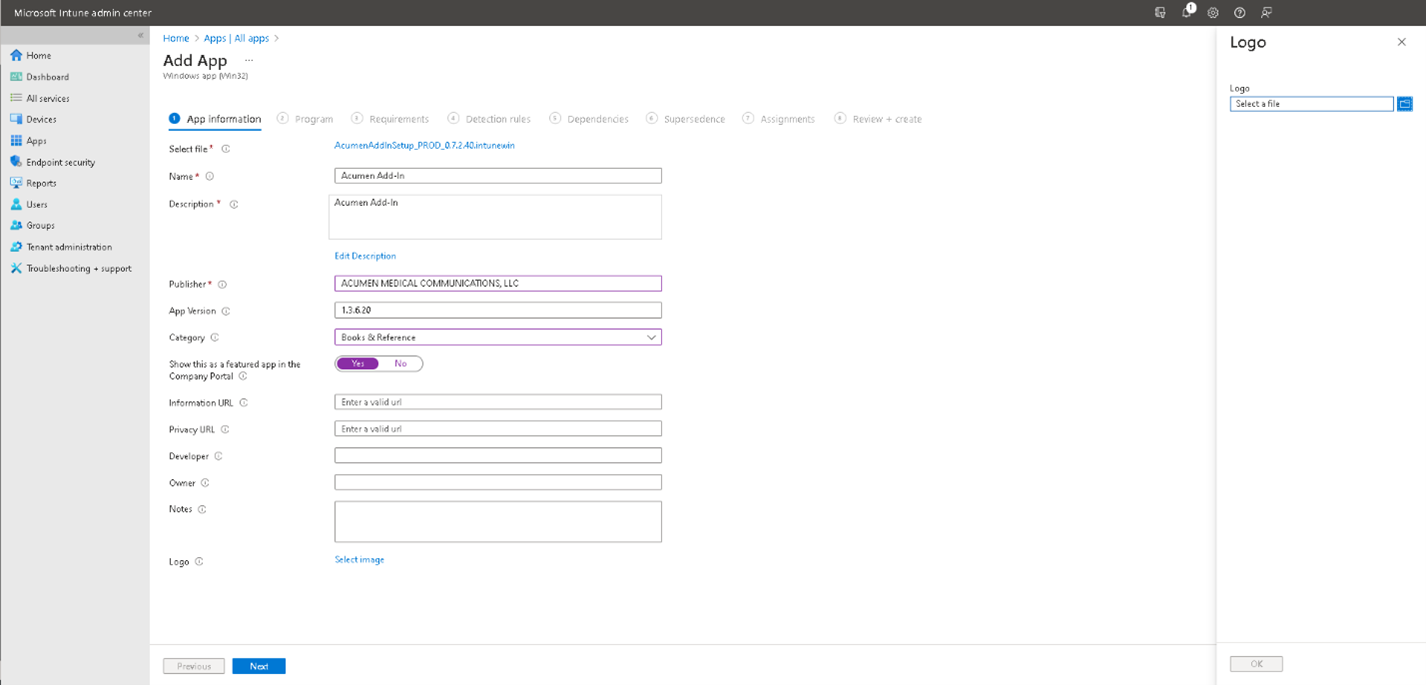
2.5. Add App Information.
Set «ACUMEN MEDICAL COMMUNICATIONS, LLC» as a publisher. It is advisable to select a category and to add a logo.
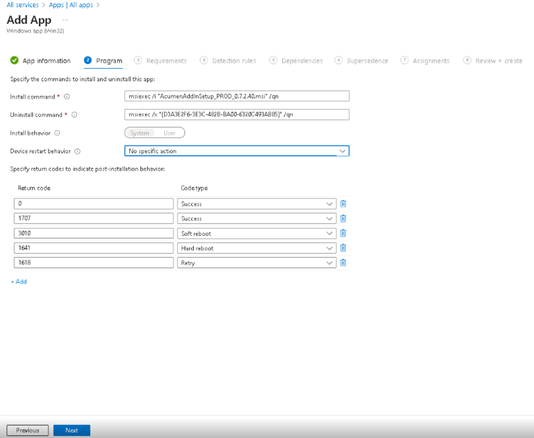
2.6. Add Program Information
Add install & uninstall commands and other additional information (see the image below).
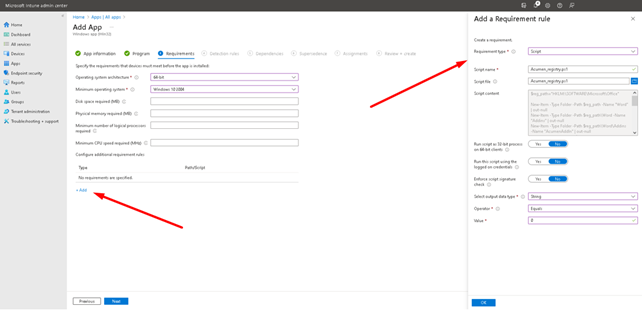
2.7. Add Requirements Information Add required fields (OS arch and minimum OS, see the image below). Also need to add PowerShell-script which creates registry values for the application. Successful exit code for the script is “0” (Write-Output “0”). Script code:
$reg_path="HKLM:\SOFTWARE\Microsoft\Office"

if ( -Not (Get-Item -Path $reg_path\Word -ErrorAction Ignore) )
	{ New-Item -Type Folder -Path $reg_path -Name "Word" | out-null }
if ( -Not (Get-Item -Path $reg_path\Word\Addins -ErrorAction Ignore) )
	{ New-Item -Type Folder -Path $reg_path\Word -Name "Addins" | out-null }
if ( -Not (Get-Item -Path $reg_path\Word\Addins\AcumenAddIn -ErrorAction Ignore) )
	{
	New-Item -Type Folder -Path $reg_path\Word\Addins -Name "AcumenAddIn" | out-null
	New-ItemProperty -Path $reg_path\Word\Addins\AcumenAddIn -Name "FriendlyName" -Value "Acumen Add-In" -PropertyType "String" | out-null
	New-ItemProperty -Path $reg_path\Word\Addins\AcumenAddIn -Name "Description" -Value "Acumen Add-In" -PropertyType  "String" | out-null
	New-ItemProperty -Path $reg_path\Word\Addins\AcumenAddIn -Name "Manifest" -Value "file:///C:\\Program Files (x86)\\AcumenAddIn\\AcumenTemplatesAddIn.vsto|vstolocal" -PropertyType "String" | out-null
	New-ItemProperty -Path $reg_path\Word\Addins\AcumenAddIn -Name "LoadBehavior" -Value 00000003 -PropertyType "DWord" | out-null
	}
else
	{
	Remove-Item -Path $reg_path\Word\Addins\AcumenAddIn -Recurse | out-null
	New-Item -Type Folder -Path $reg_path\Word\Addins -Name "AcumenAddIn" | out-null
	New-ItemProperty -Path $reg_path\Word\Addins\AcumenAddIn -Name "FriendlyName" -Value "Acumen Add-In" -PropertyType "String" | out-null
	New-ItemProperty -Path $reg_path\Word\Addins\AcumenAddIn -Name "Description" -Value "Acumen Add-In" -PropertyType  "String" | out-null
	New-ItemProperty -Path $reg_path\Word\Addins\AcumenAddIn -Name "Manifest" -Value "file:///C:\\Program Files (x86)\\AcumenAddIn\\AcumenTemplatesAddIn.vsto|vstolocal" -PropertyType "String" | out-null
	New-ItemProperty -Path $reg_path\Word\Addins\AcumenAddIn -Name "LoadBehavior" -Value 00000003 -PropertyType "DWord" | out-null
	}
Write-Output "0"
exit
Write-Output
2.8. Add Detection Rules Information
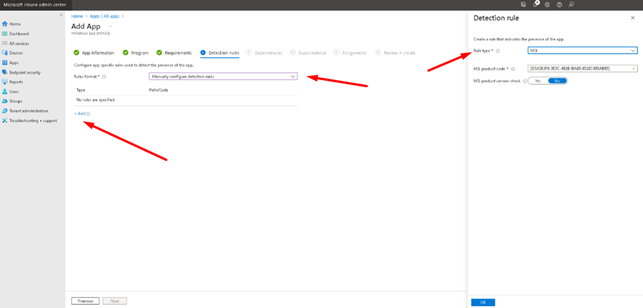
Select “Manually configure detection rules” as Rules Format and add detection rule (see the image below).
2.9. Skip Dependencies
2.10. Skip Supersedence Information
2.11. Add Assignments Information
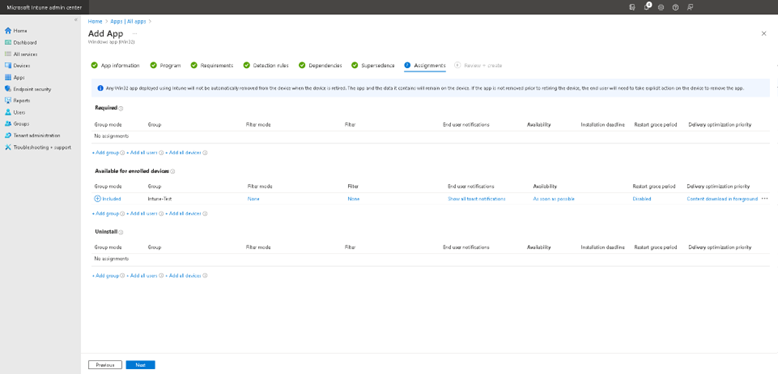
Add needed assignments. Example is shown below:
2.12. Review + create
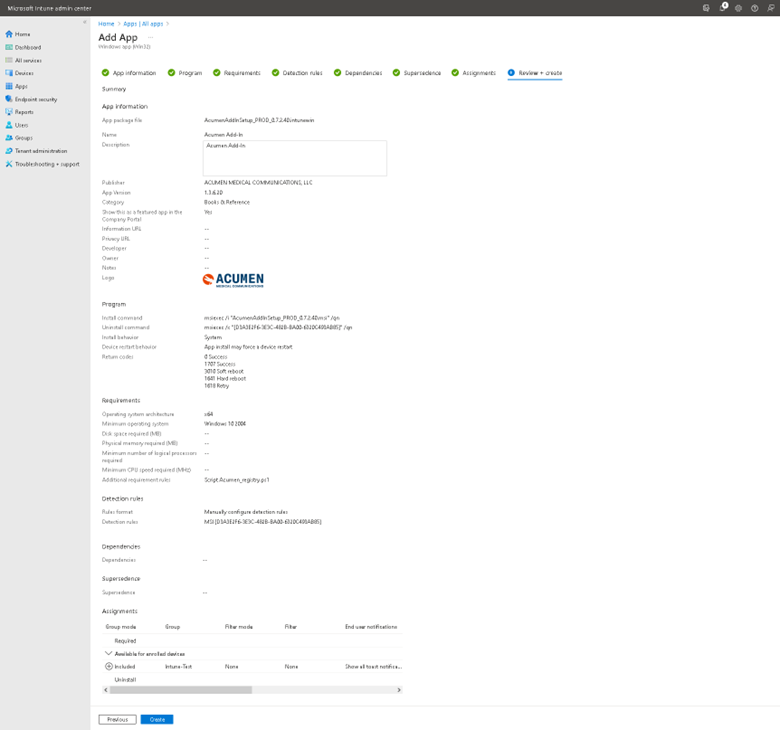
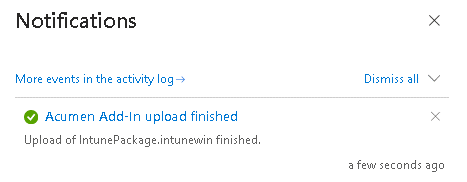
In this section you can recheck all information before creating the app (check the image below). Click “Create” and wait until the created application will appear (about 15 min).
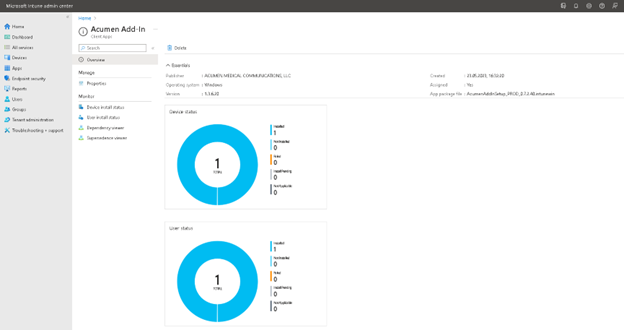
Once it is deployed, you can see the statistics of the Acumen Add-In application.


