![]()
Acumen User Guides
E-Style Version 2 Guide
Table of Contents
The E-Style Guide Add-in allows users and editors to create and edit E-Style Guides which can scan documents for inconsistencies and other discrepancies in word. To utilize this tool, go to the home tab of word and if the add-in is installed click on the Acumen Add-in button. This is where you can access your E-Style Guide and utilize it.

If it is not already installed, you can follow the link here to learn more on how to get the Acumen Add-in installed.
Getting Started
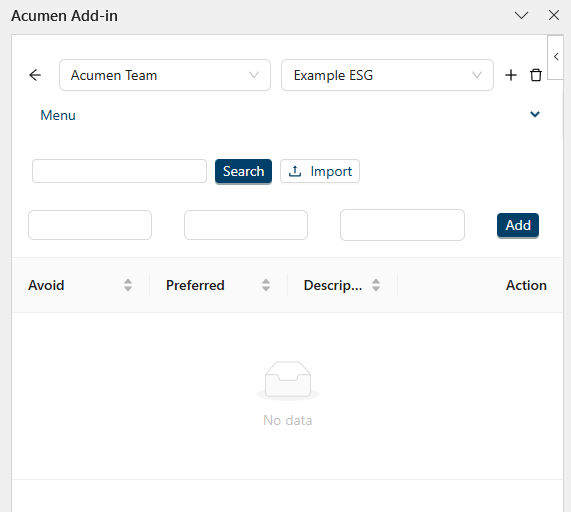
When entering the Plugin’s Add-in Window you’ll be greeted with the following:

Depending on the type of user account you have (either being a regular user or an editor) there will be a few tools made available to you. The first of which being available to all users is the ability to use the ESG to run a E-Style against your currently opened word doc.
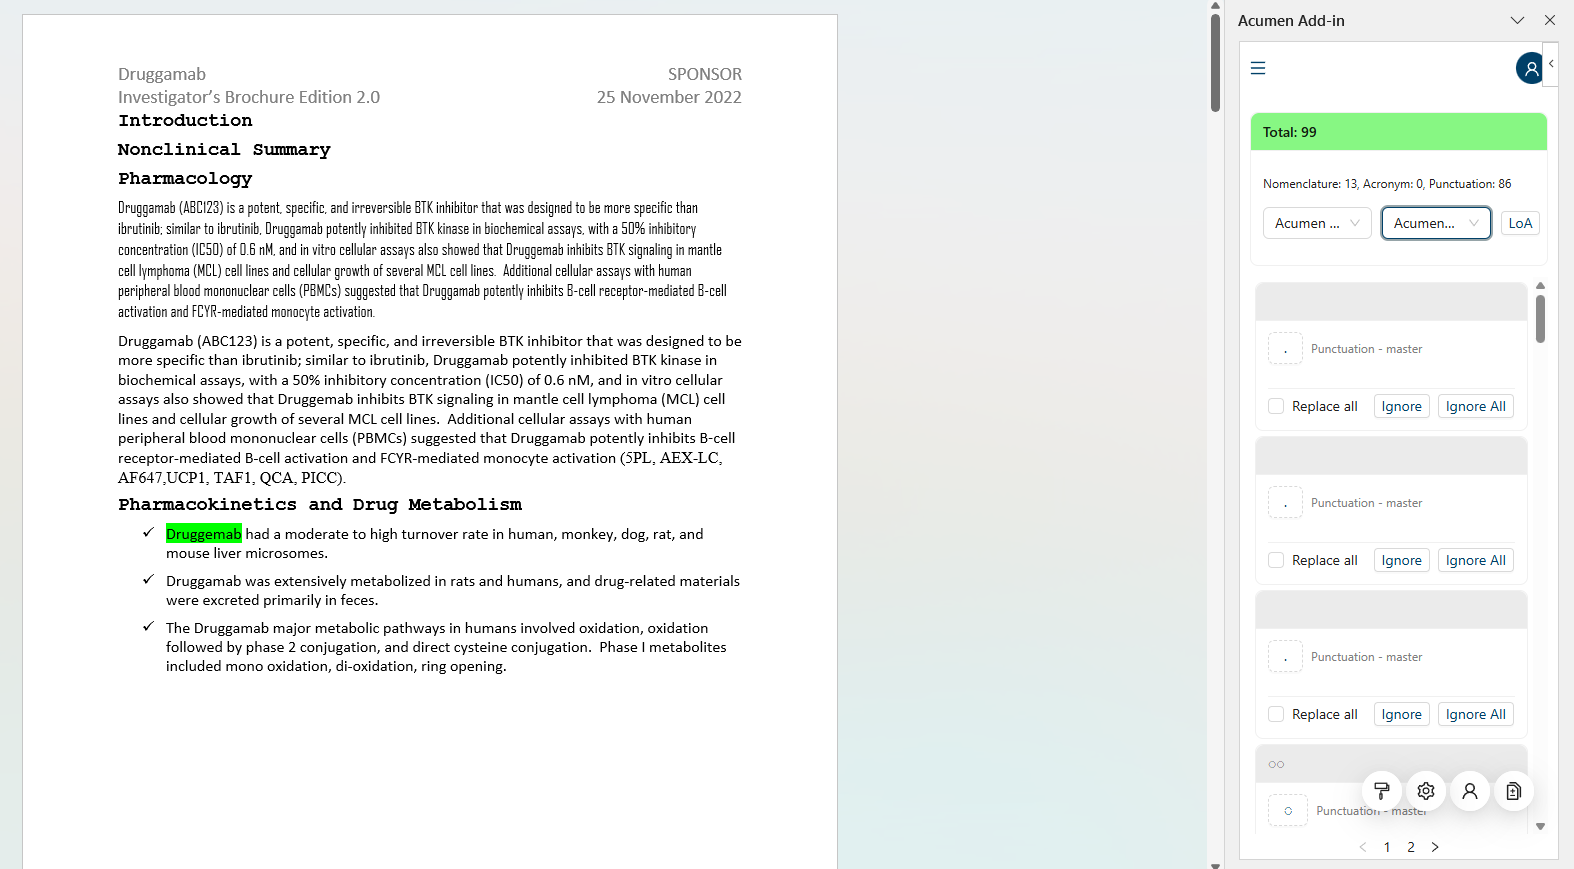
In order to do so as shown in the image above all users must do is select the Company and E-Style Guide for it to run and it’ll automatically run against the document and detect discrepancies that do not align with the E-Style Guide that is utilized. Clicking on the box containing the change (such as the box containing a period in the image above) will add in / modify the offending item to match the recommendation. Clicking the “Replace all” checkbox will apply said change to all matching results.
In the example above there are 99 detected issues (most of which being punctuations), when checking off the “replace all” checkbox and clicking on the period the ESG quickly added every period currently on the ESG list that needs to be added, bringing the total from 99 down to 36 as shown in the image below.
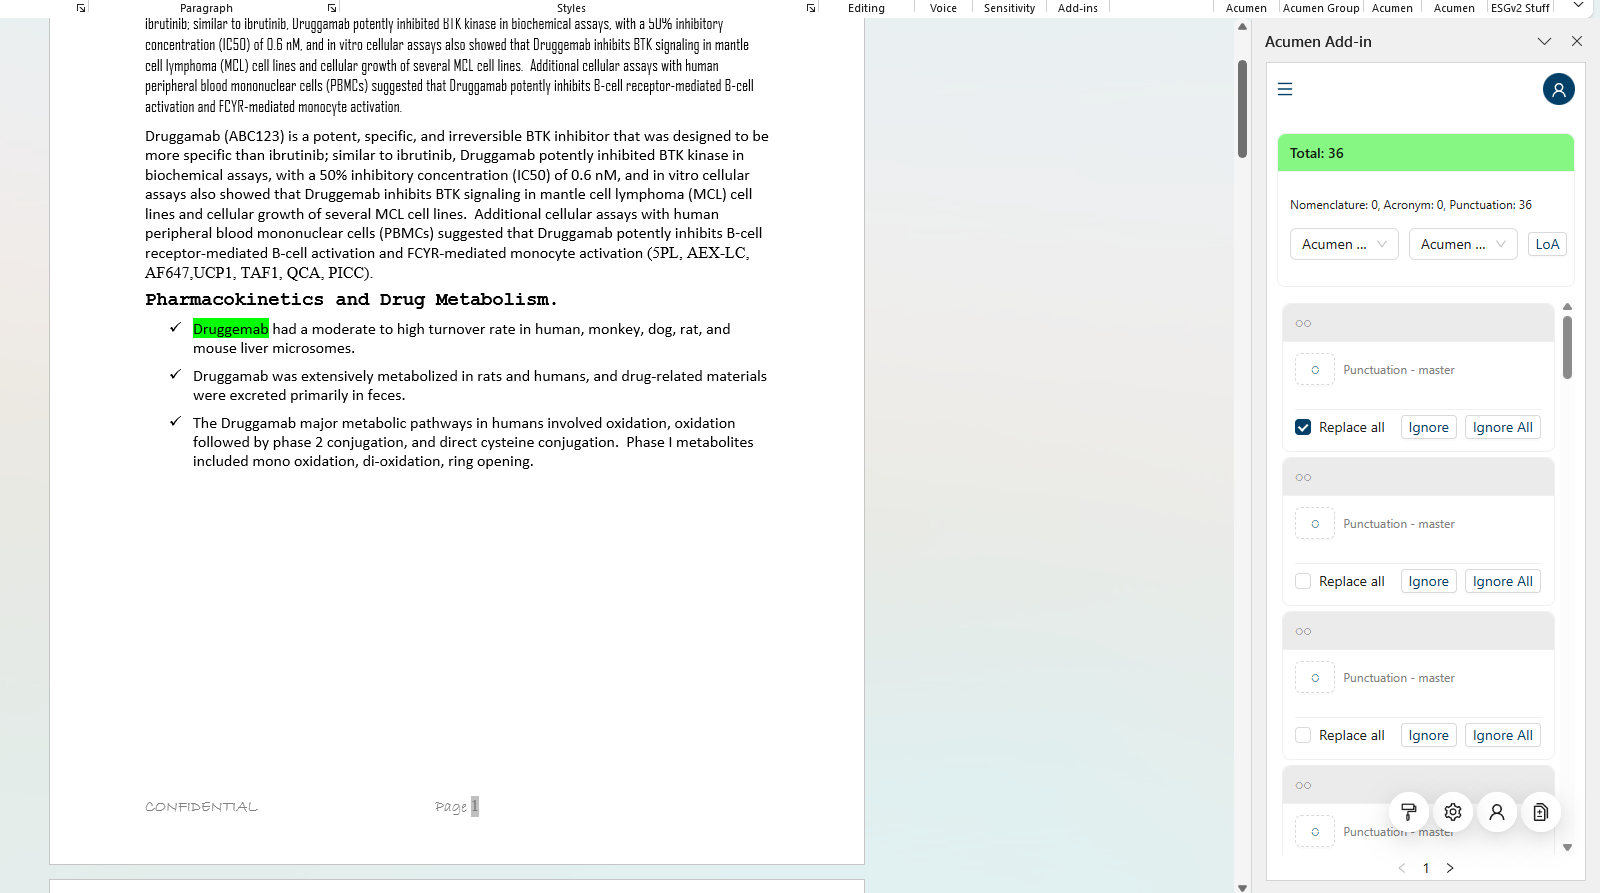
Ignore and Ignore all does a similar process to the one shown above but instead of applying the change it simply ignores the recommendation(s) and removes it form the list.
Last but not least users are able to click LoA to generate a separate List of Acronyms Document. It will scan the currently opened Word Doc for acronyms and created a list of ones detected as a separate document. The list will include the acronym, matching definition (if any is given in the E-Style Guide) and the count of them in said document.

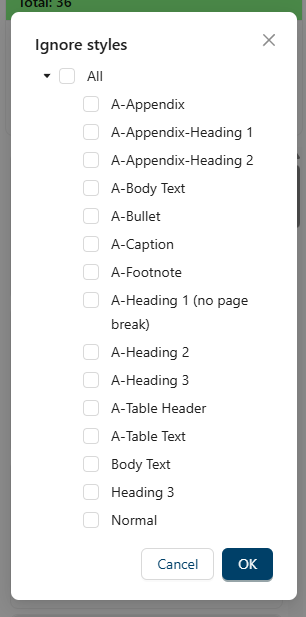
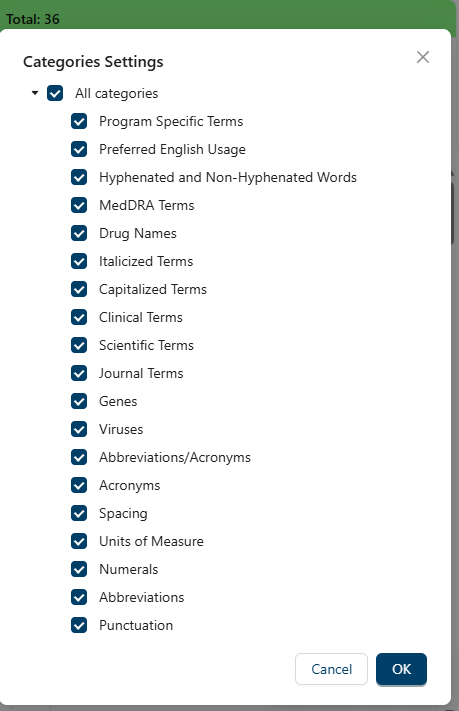
Further below the E-Style Guide Tool will be a few icons which can be clicked on which opens up a few different settings users can change.

The First icon (One that looks like a paint roller) allows users to select what styles they’d like to have ignored by the E-Style Guide when scanning for issues.
The next icon (Looks like a cog-wheel) allows for certain categories to not be utilized when running the E-Style Guide for more targeted scanning.
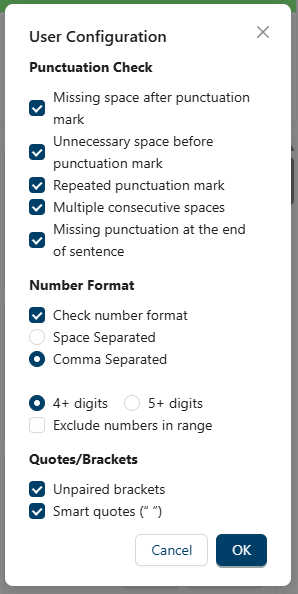
The icon that looks like a person’s silhouette allows for changes to be done involving the individual user’s preferences such as looking for specific punctuations, specific formatting with numbering, excluding certain numbers and so on.
The very last icon on the right (icon that looks like some pages with a plus on the front) is where users with editor permissions can edit pre-existing and/or create new ESGs. For more information on creating an ESG see the next section below Creating a ESG and for editing one see E-Style Guide Editing.
Creating a ESG
In order to utilize the E-Style Guide you’ll need to first create one, to do so click on the Page icon found on the bottom right of the page.
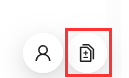
And then click on the first drop down to select the Subscription you’d like to have the E-Style guide under and click on the plus symbol to create one.
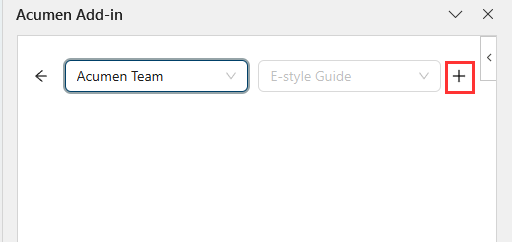
From here a pop-up window will appear where you can put down the name of your E-Style guide, you can either create it as something new from scratch or click “select from predefined” to copy existing E-Style Guides. When you’re all set click Ok
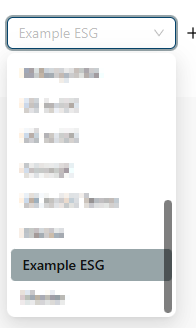
You should now see the new E-Style guide under the E-Style guide drop-down menu.
E-Style Guide Editing
When selecting either a pre-existing E-Style Guide or after creating a brand new one from scratch the following items shown in the image below will appear in the E-Style Guide v2.
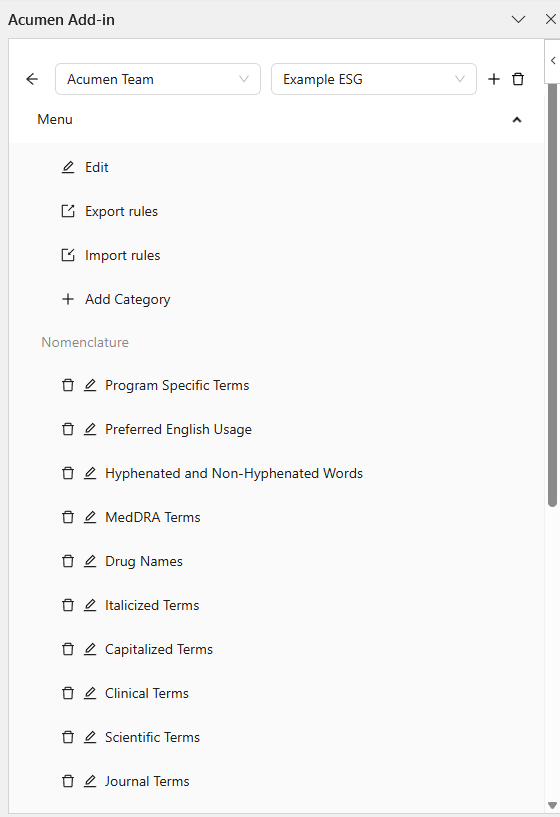
NOTE: These can be edited at any time by selecting the company and E-Style Guide in the same section as mentioned prior and clicking on the menu tab.
Starting from the top of the E-Style Guide Menu one will find an Edit button where the name of the ESG can be changed as well as a Import rules and Export rules button below. Clicking on export will export the E-Style Guide Configuration itself as an excel file and import will allow you to import said file onto another E-Style Guide.
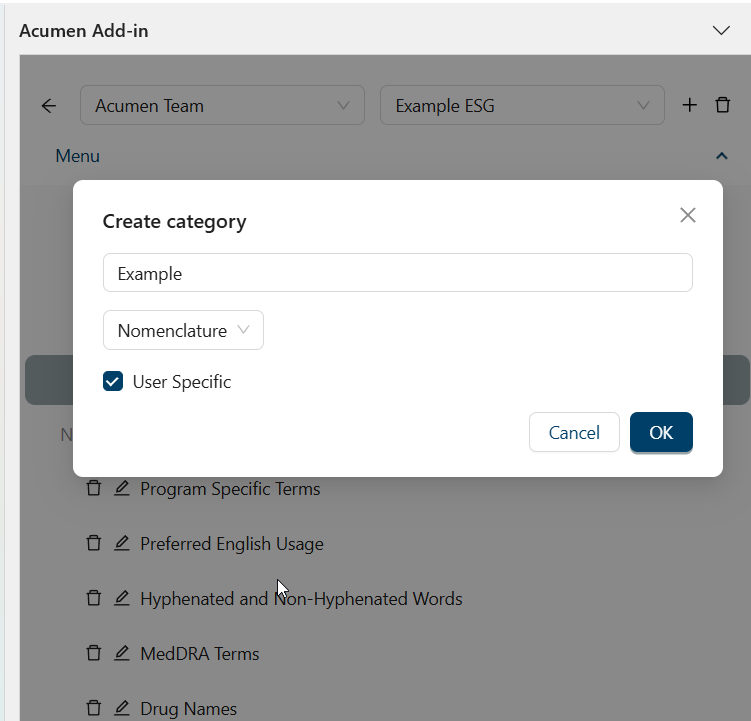
Add Category meanwhile allows for custom categories to be added besides the ones listed by default underneath either Nomenclature, Acronyms or Punctuations.
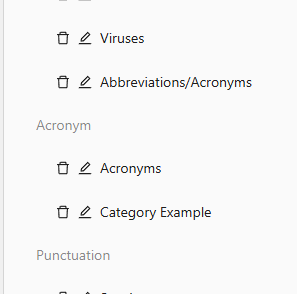
Underneath category will be the sections labelled Nomenclature, Acronyms and Punctuations with each being broken down into different categories.
Clicking on any of the categories allows editors to edit said category with avoid/preferred terms that can be utilized by the E-Style Guide when scanning word docs. Below is an image of an empty category, namely the example one shown on the previous image when opened.
To add avoid/pref. terms editors can put down the avoid term (what term you want to be replaced), the preferred term (what to replace said term with) and a description in the top text box and click Add to add them to the category. The next time a user runs an E-Style Guide Scan on a doc this the avoid term will be scanned for and then actively recommended for replacement with the preferred term.
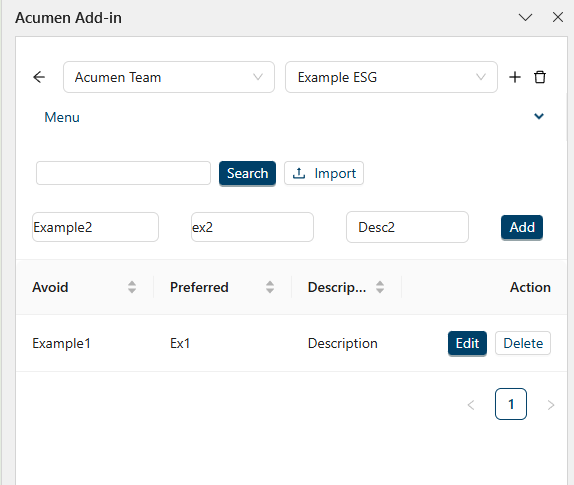
All changes made under each categories are changed live which means once added it will automatically be saved to the ESG. Editors can also import definitions via the import button on the top.
Activation
Below are step by step instructions for activating the ESG Version 2 Add-in.
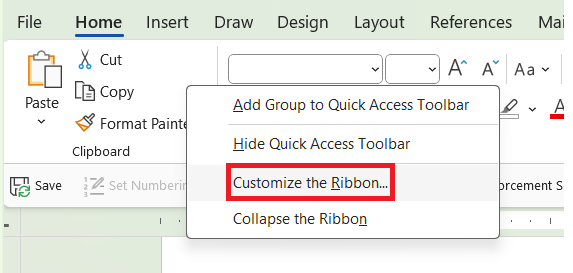
Step 1. Right-click in the Home MS Word tab and select Customize the Ribbon:
Step 2. Add the “Add-ins” button (you might have to select “All Commands” first):
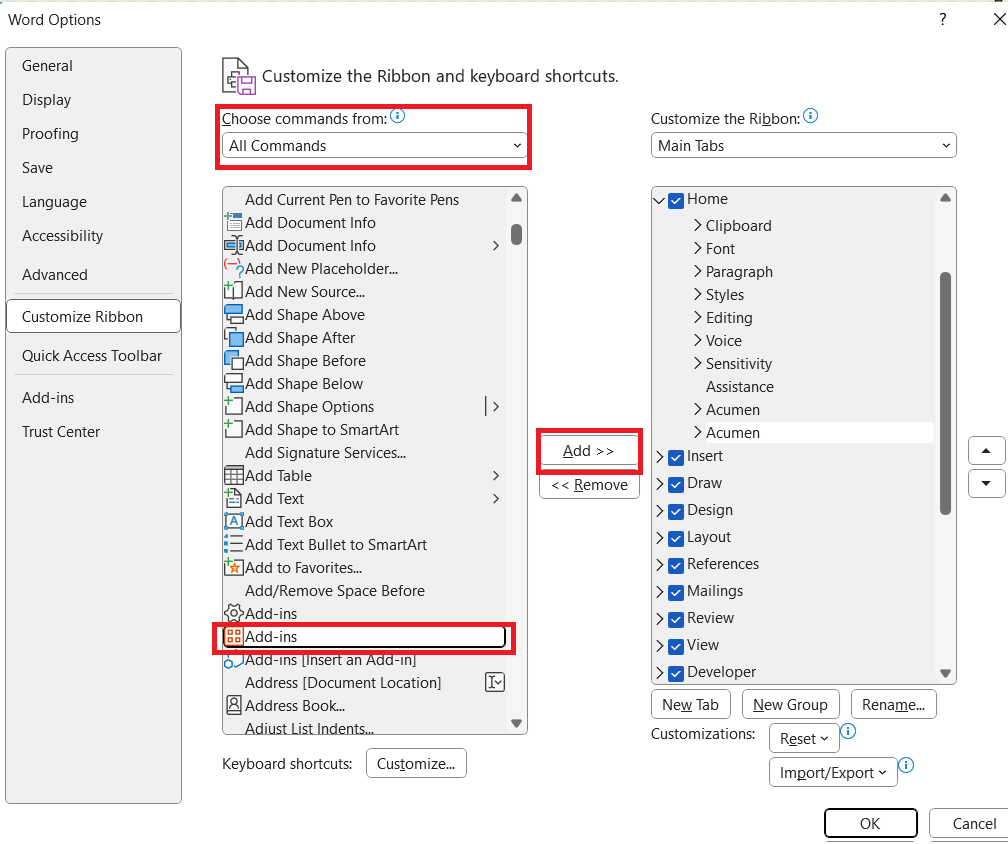
Step 3. Click Add-ins.
Step 4. Search for Acumen.
Step 5. Click “Add”, you should see Acumen Add-in now under the Home tab.
Step 6. Click on the Acumen Add-in button and login with your email and password.