Acumen User Guides
Table of Contents
Website Navigation Guide
To get to your personal Acumen Web Account you will first need to login to our web user interface at the following link preferably a Google Chrome browser:
https://solutions-portal.acumenmedcom.com/PluginAuthorization
You will need to log in using the administrator email and password provided to you in a welcome email from the Acumen team.

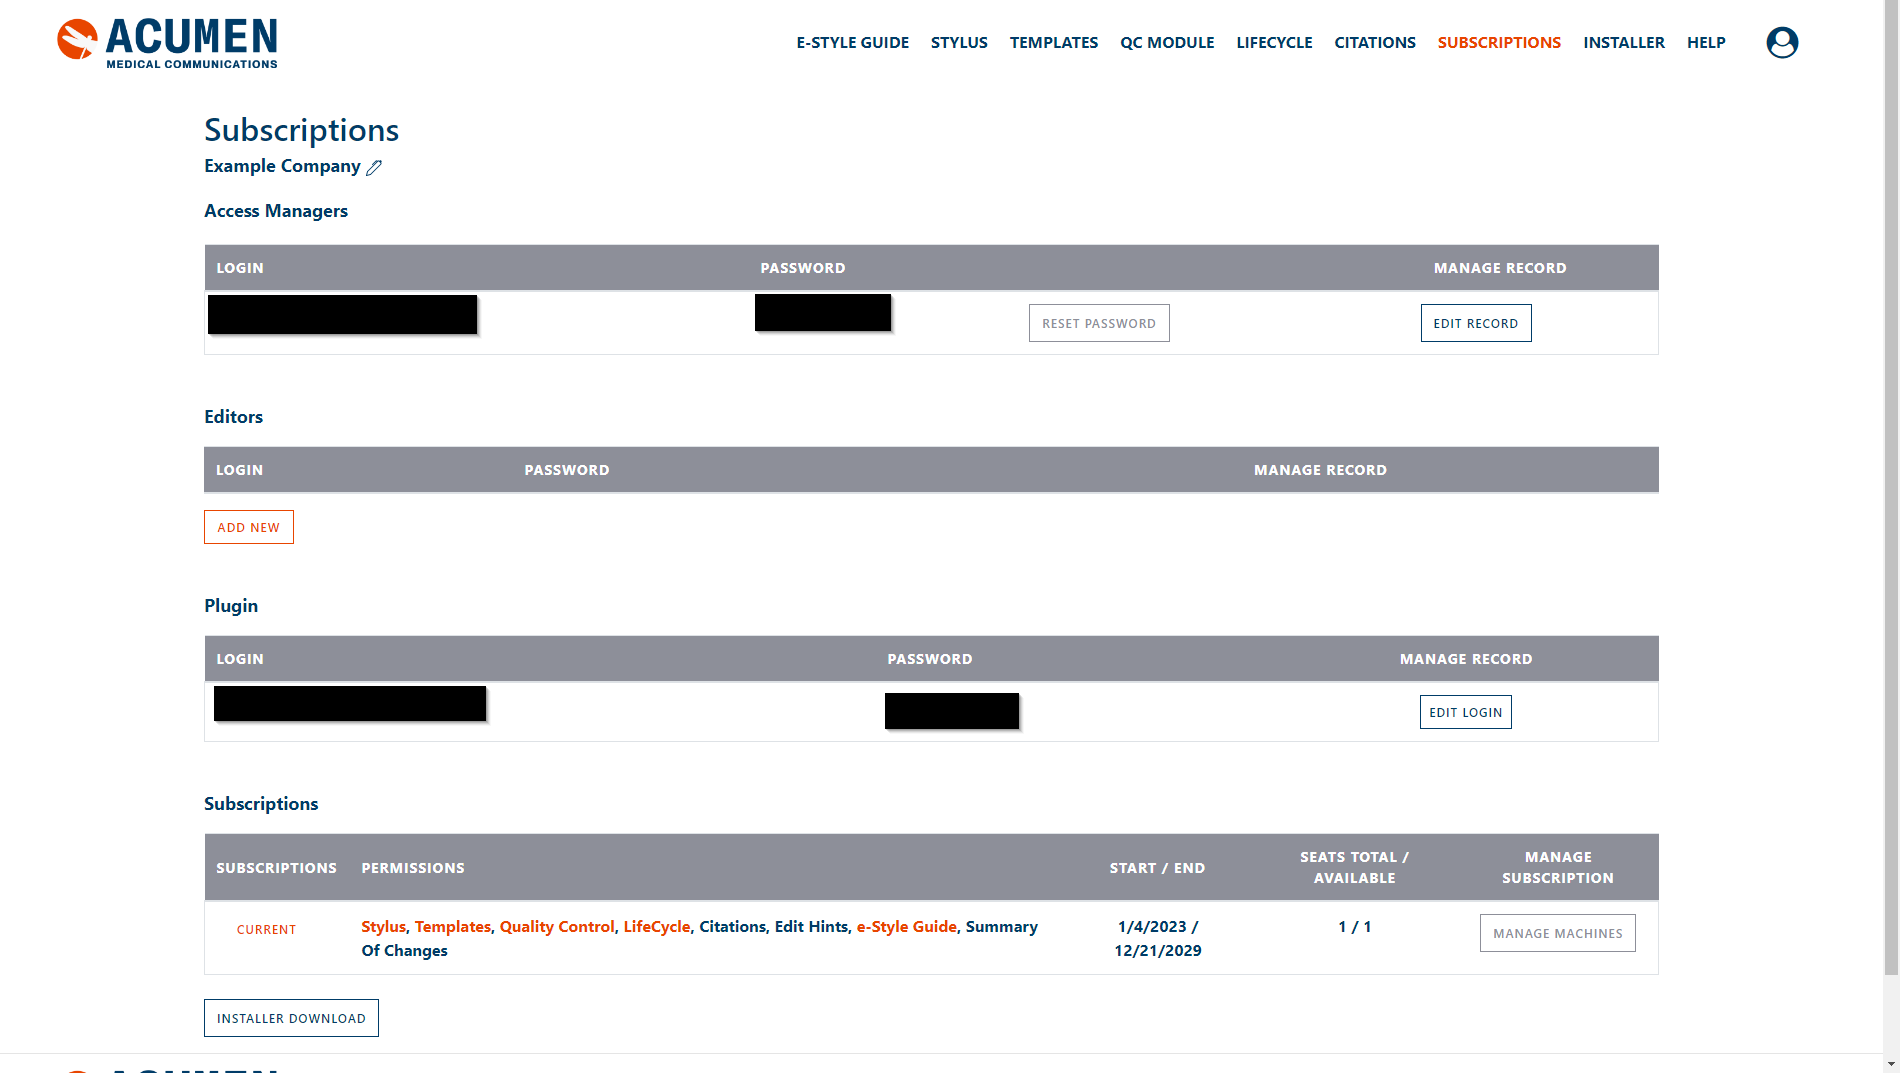
A successful log then will bring you to your individual Subscriptions homepage. This is your portal to manage your subscription to the selected features of the Acumen Smart Document Solution. You will note that the email and password that was used to log in is shown in the upper middle portion of the page.

E-Style Guide
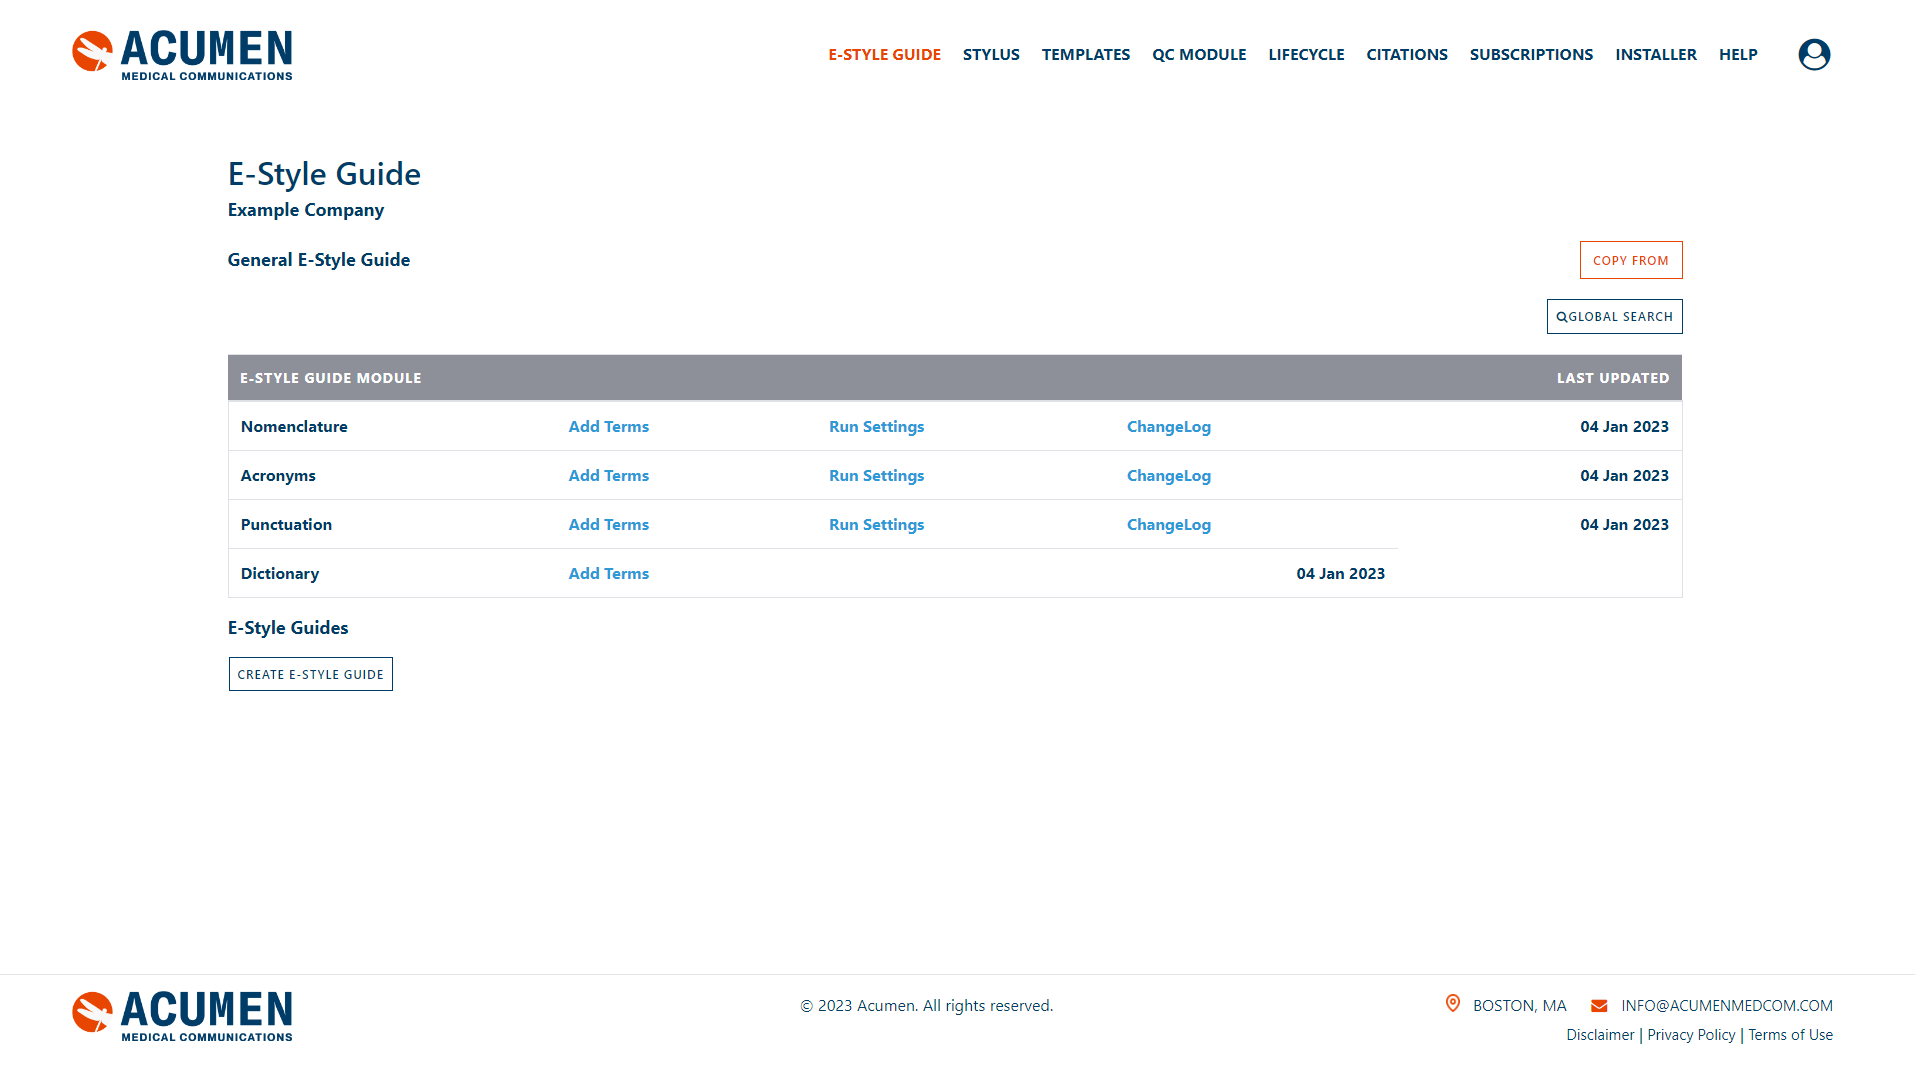
If you have the E-Style Tool available for your account you will also have a E-Style Tab available on the user website. This tab allows you to edit the contents of your own personal E-Style Guide’s Nomenclature, Acronyms, Punctuation and Dictionary. Depending on specifications made you it may be prefilled with information provided by Acumen’s Own E-Style Guide or maybe left empty for yourself to fill in with information yourself.
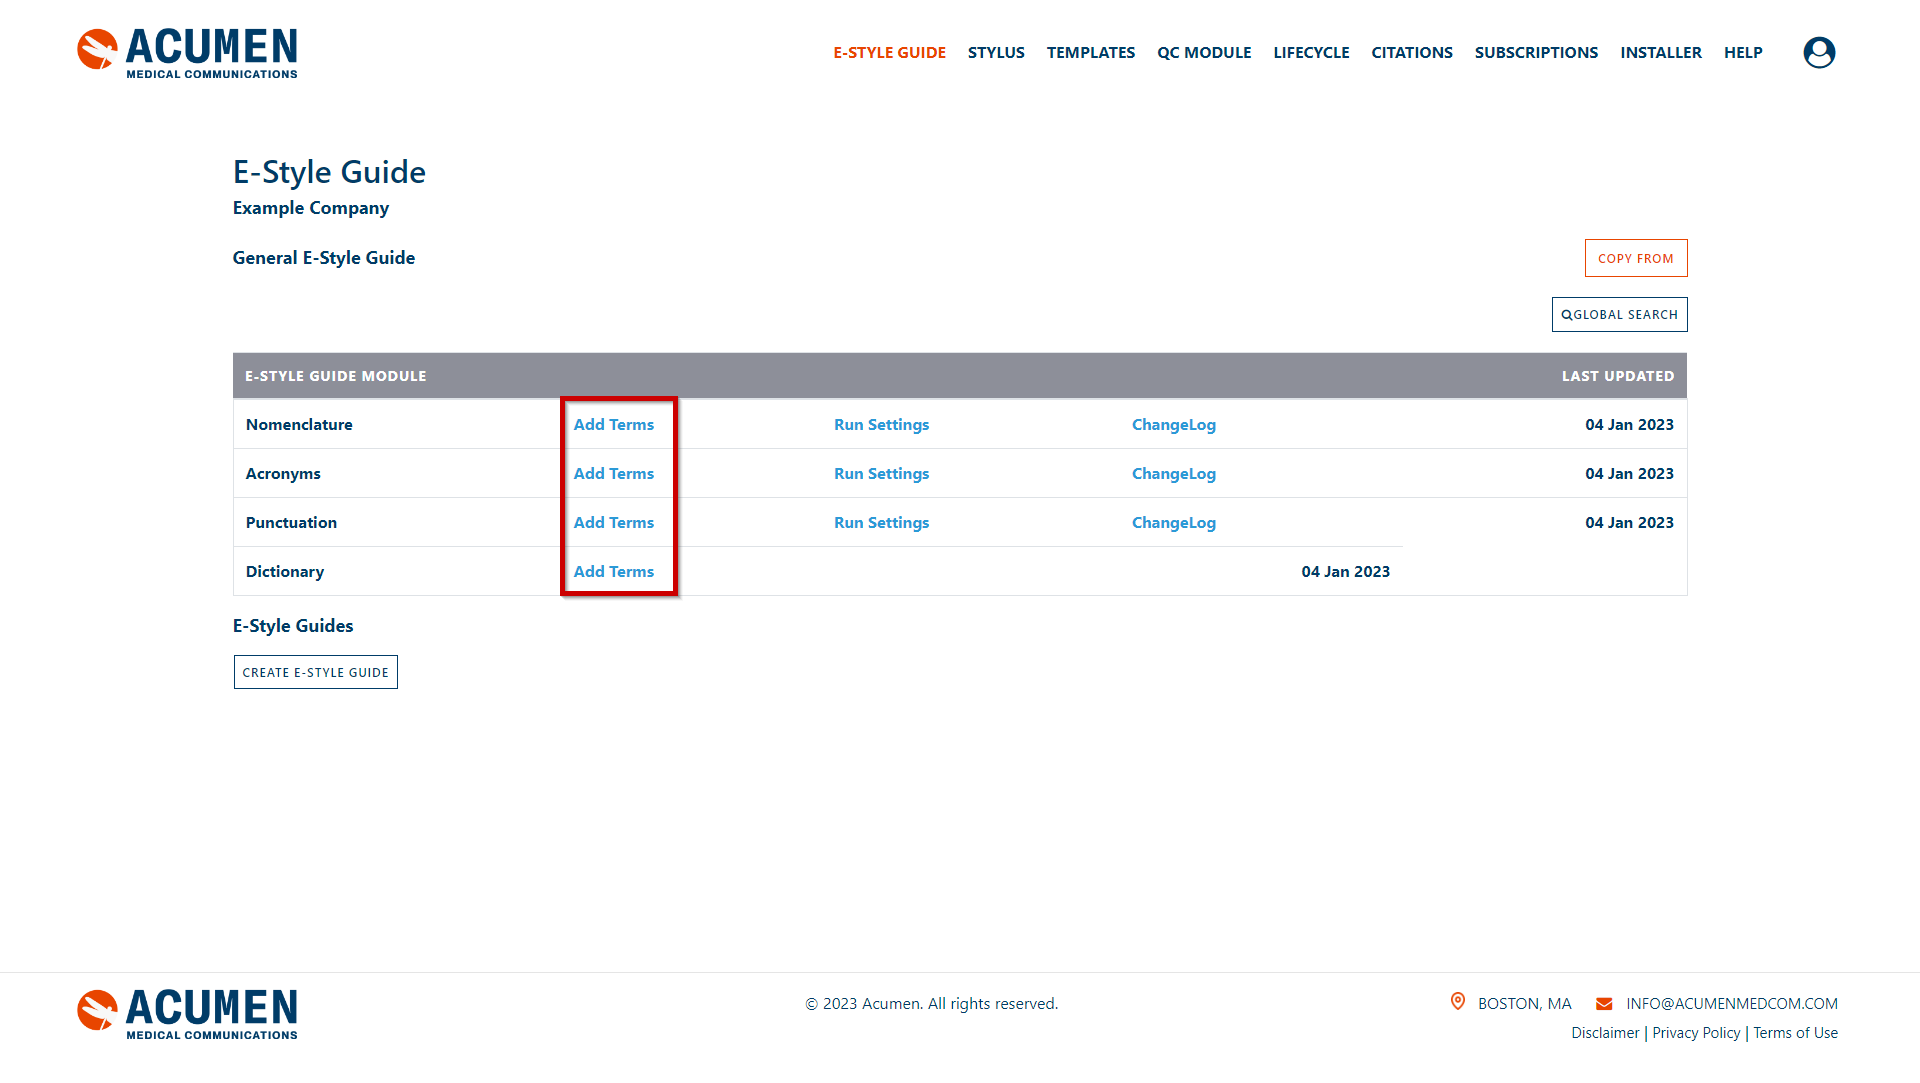
To add terms to any of your E-Style Guide Modules, click on the Add Terms button next to the module you’d like to edit.
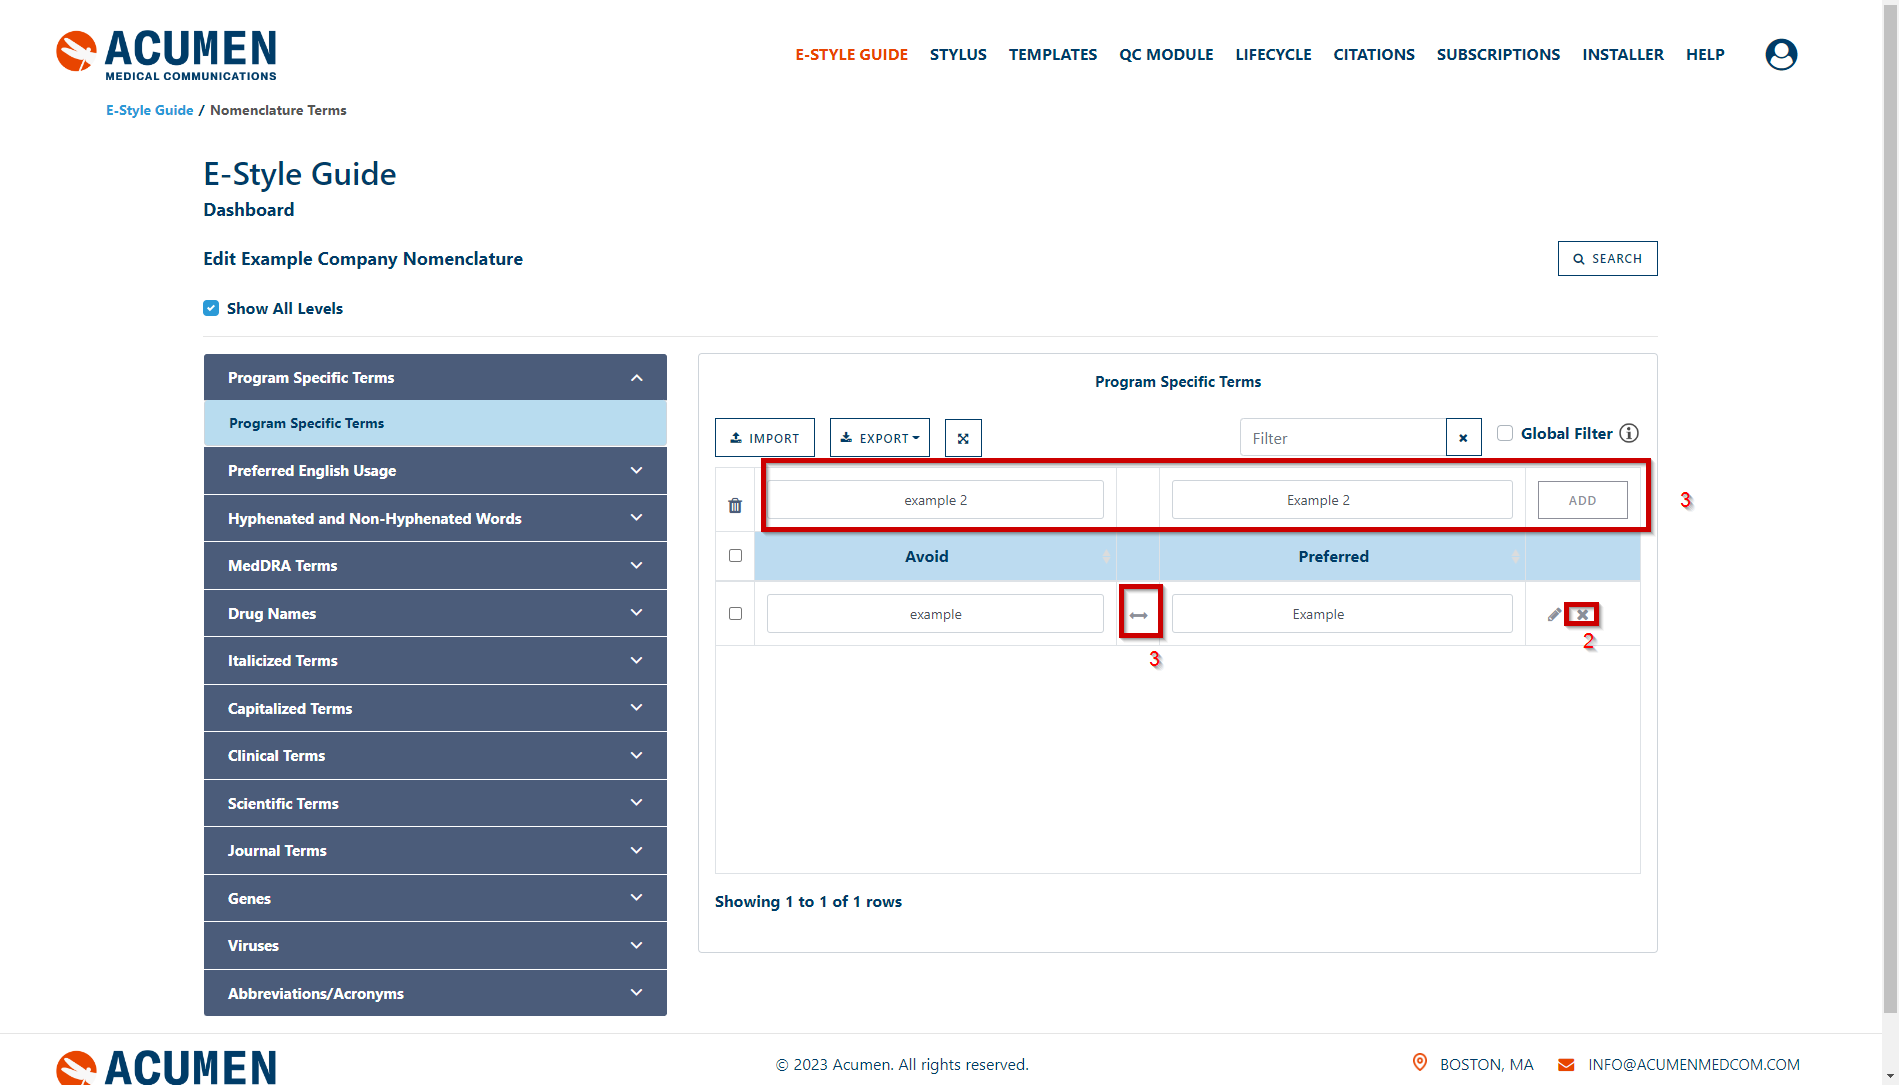
New items can be added to any subsection by completing each cell for an “Avoid” and “Preferred” term or rule and then clicking Save. A new row will then be automatically created for further additions. Once saved, the terms will automatically alphabetize. Users can also import or export E-Style Guides by using the Import and Export buttons respectively on the top left of the terms section.
NOTE: Additionally, users can delete unwanted terms/rules (2) or reverse terms as needed (3).
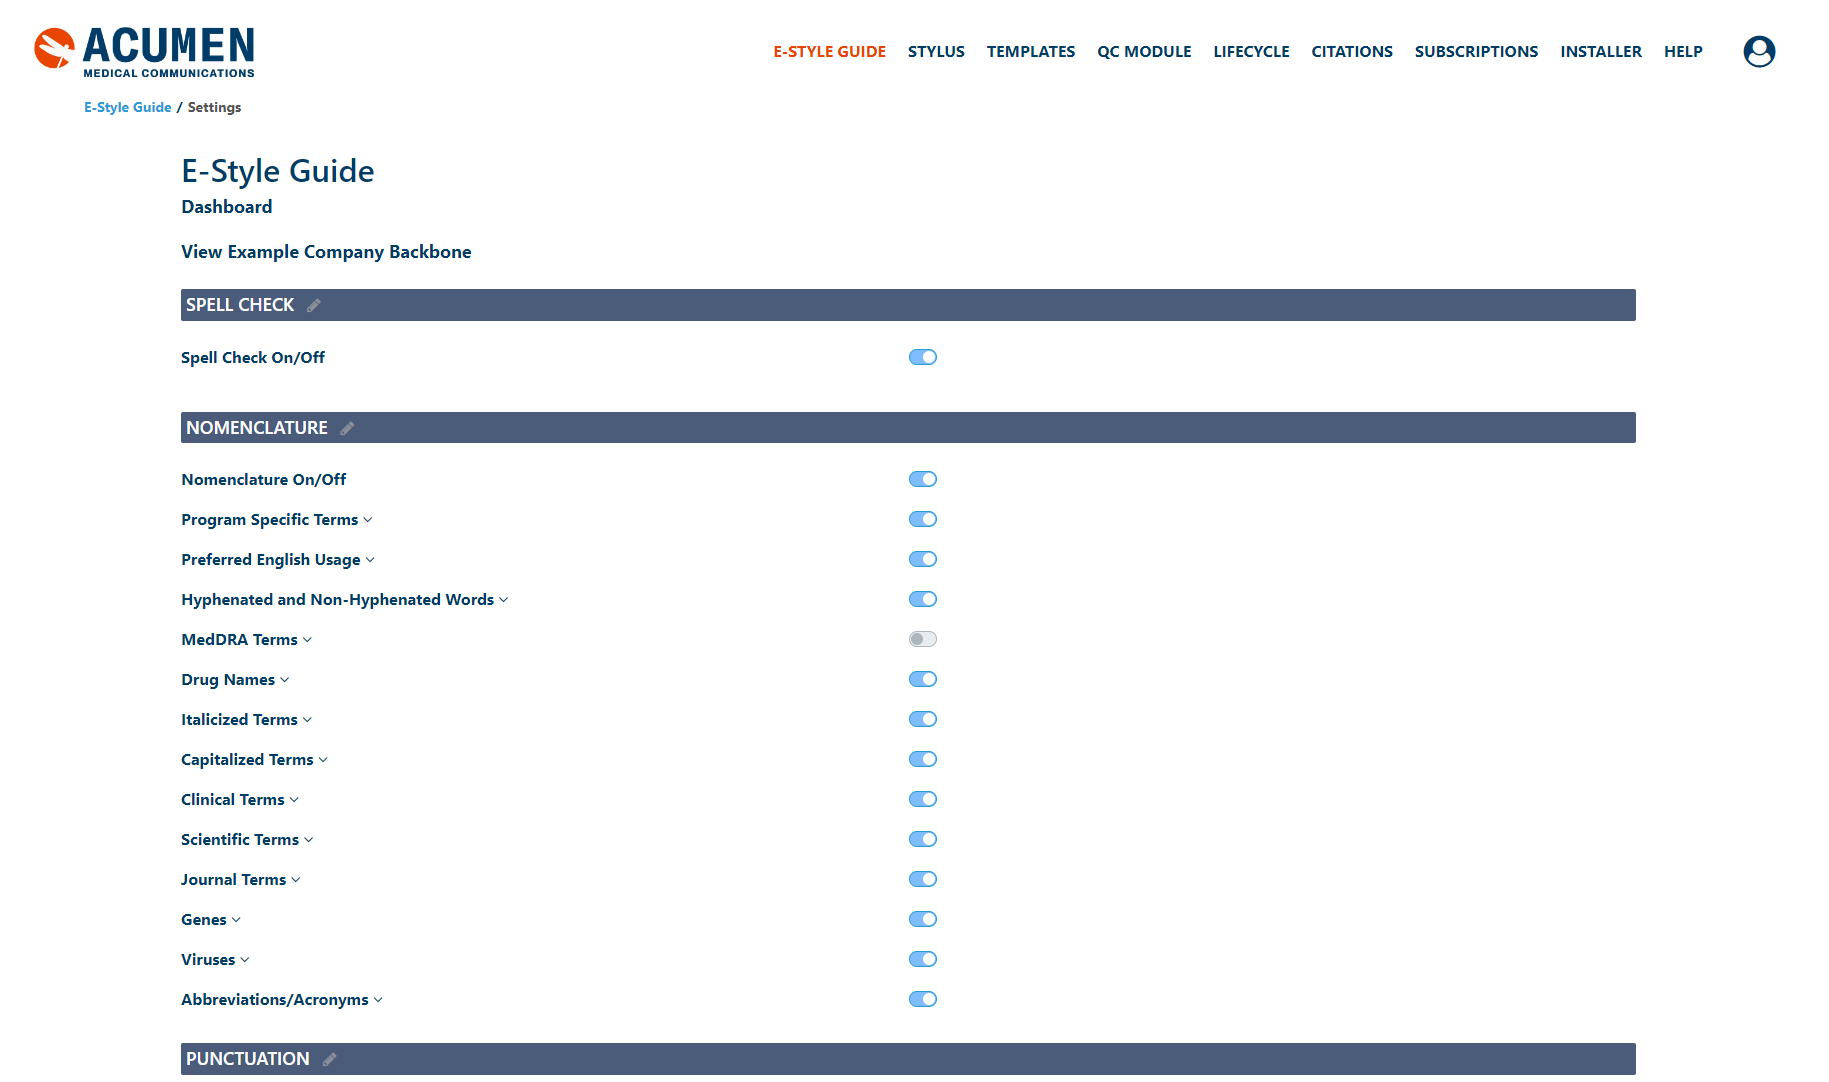
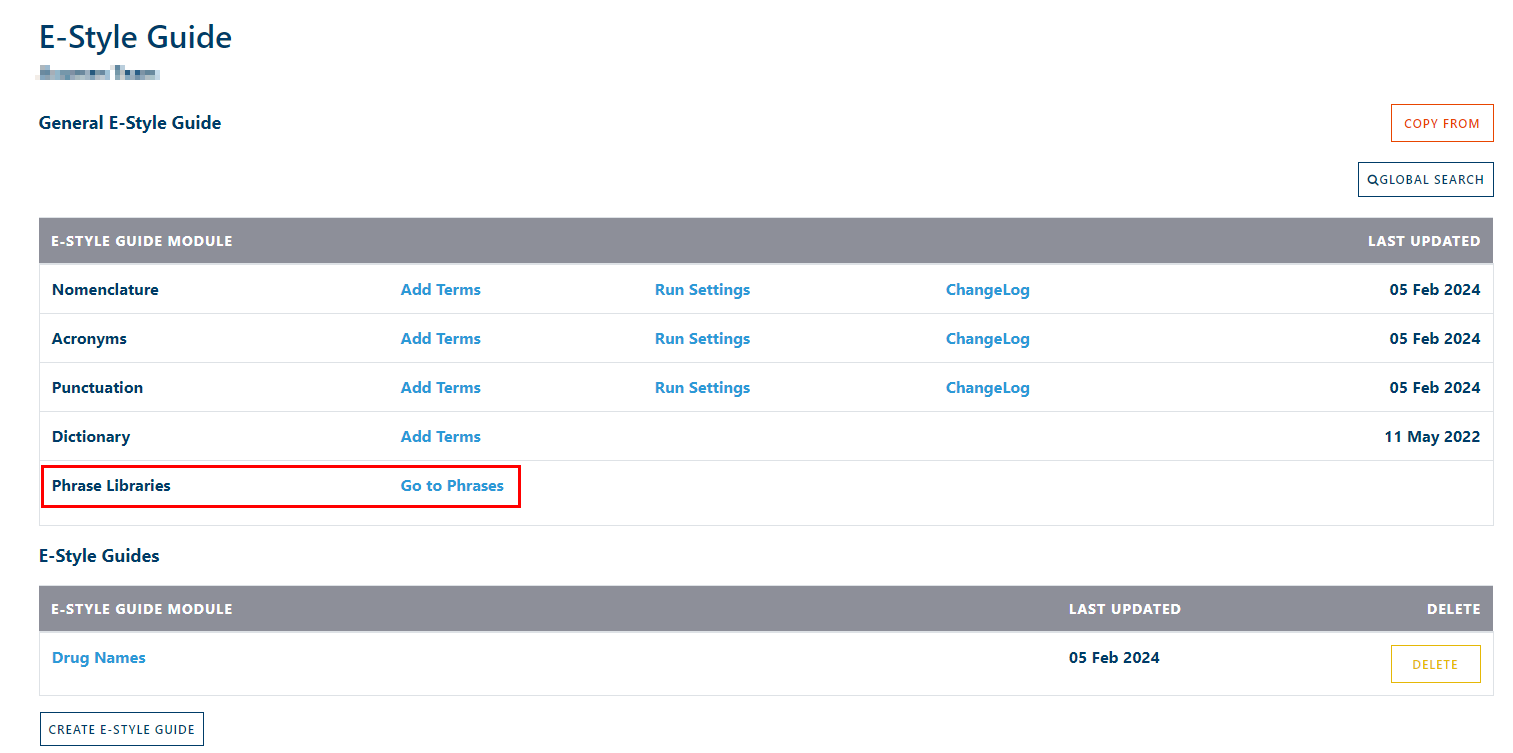
From the main e-Style Guide page, the “Run Settings” link for each of the 3 categories will direct the user to an interface where they can toggle on or off any category or subcategory within the main section. This is helpful to allow the user to run a targeted scan (or “micro-scan”) of the document for just specific style rule that they wish to check. Any combination of search settings is permissible.
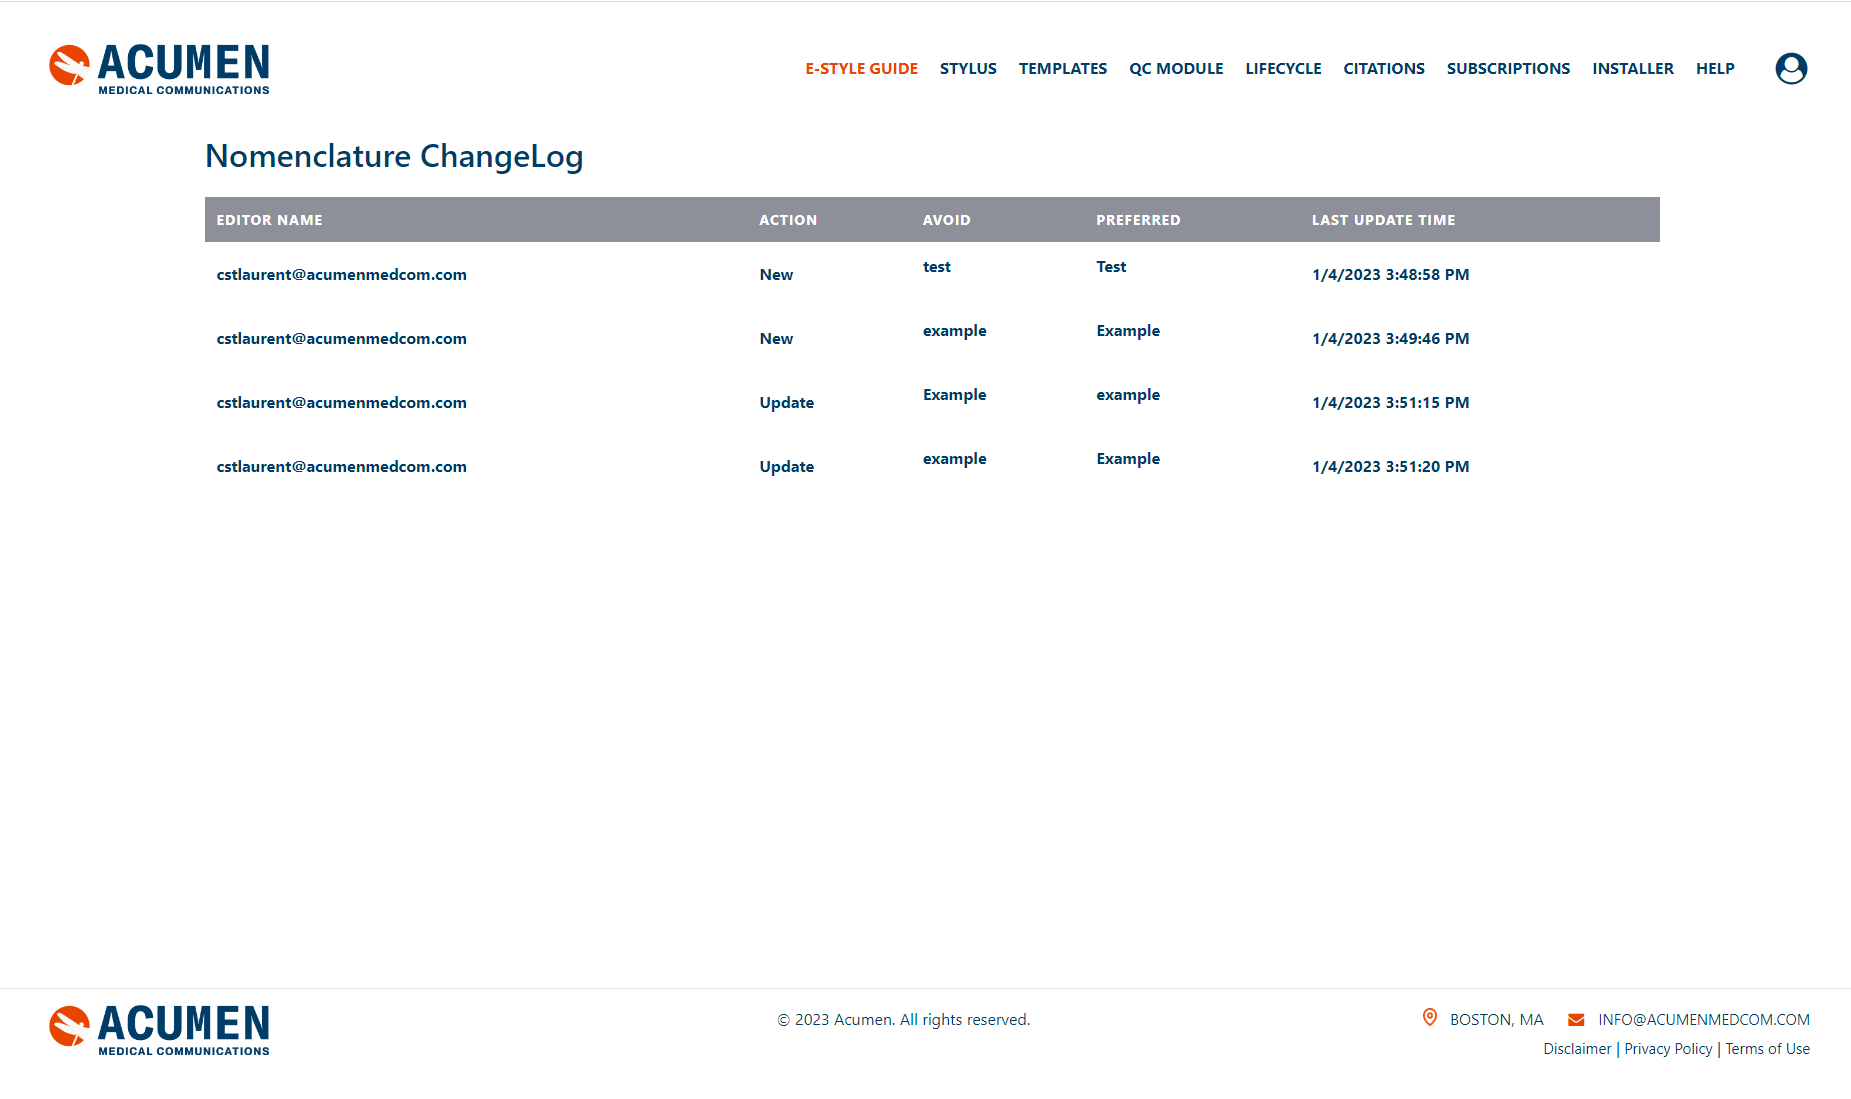
Lastly by clicking the ChangeLog Button you can view changes made to that specific E-Style Guide Module.
By clicking the “Create e-Style Guide” button from the main e-Style Guide page, you will be prompted to provide a name for this new style guide. It will automatically contain the data from the core backbone of information. The user will simply need to add of terms and rules to distinguish this style guide from other that you may have.
This feature is helpful if there are different conventions used between product programs or indication. It allows each sub-style guide to be catered to the specific needs of a program or asset or brand.
Phrase Library
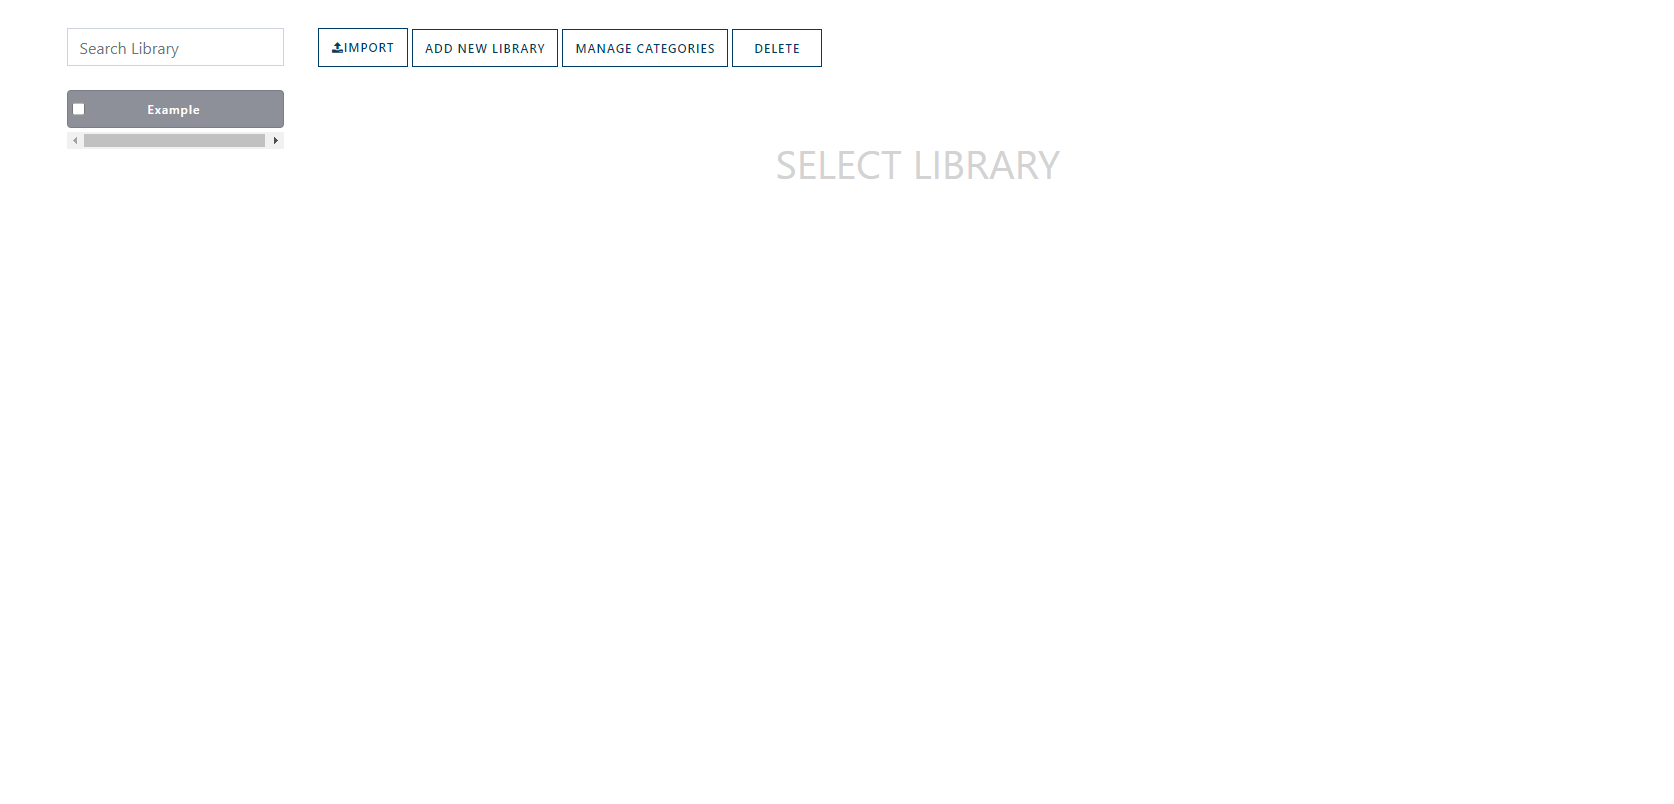
Another feature included is the Phrase Library tool, which allows users you create Phrase Libraries to utilize when writing. To access their Phrases users can click on Go to Phrases which will give them a list of all libraries available.
From here users can import Phrase Libraries if they have any files on hand as well as Add New Libraries which will create a empty library on the left navigation bar. Users are also able to Delete entire libraries by clicking the check box found next to each library.
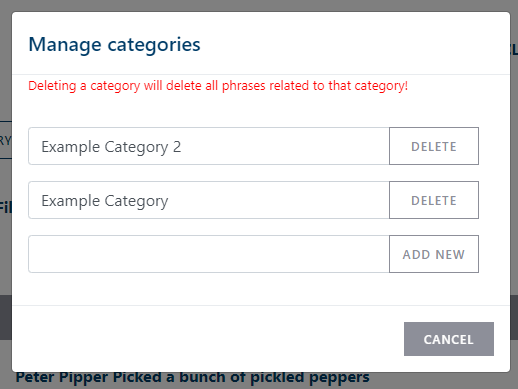
Lastly, the Manage Categories allows users to create, delete and edit categories, this feature is required for the creation of new Phrases.
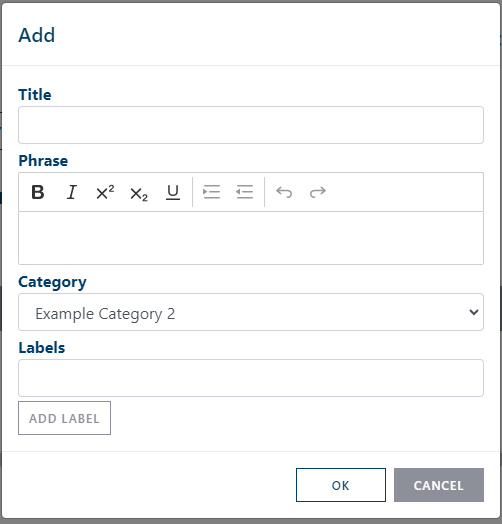
Clicking on any Phrase library on the list will show the contents of said library as well as more options. These options include the ability to add or delete phrases as well as edit the library name. When adding a phrase, users will be prompted with the following screen.
Starting from the top, phrases consist of the following:
Title: Title of the phrase
Phrase: Content that can be used to paste said phrase into document(s). See here for more details.
Category: Category for phrase to be listed under
Labels: Labels that might want to be added to phrase for better organization.
Once all boxes are filled clicking Ok or Save if editing an existing phrase to save the phrase to the Phrase Library.
Stylus
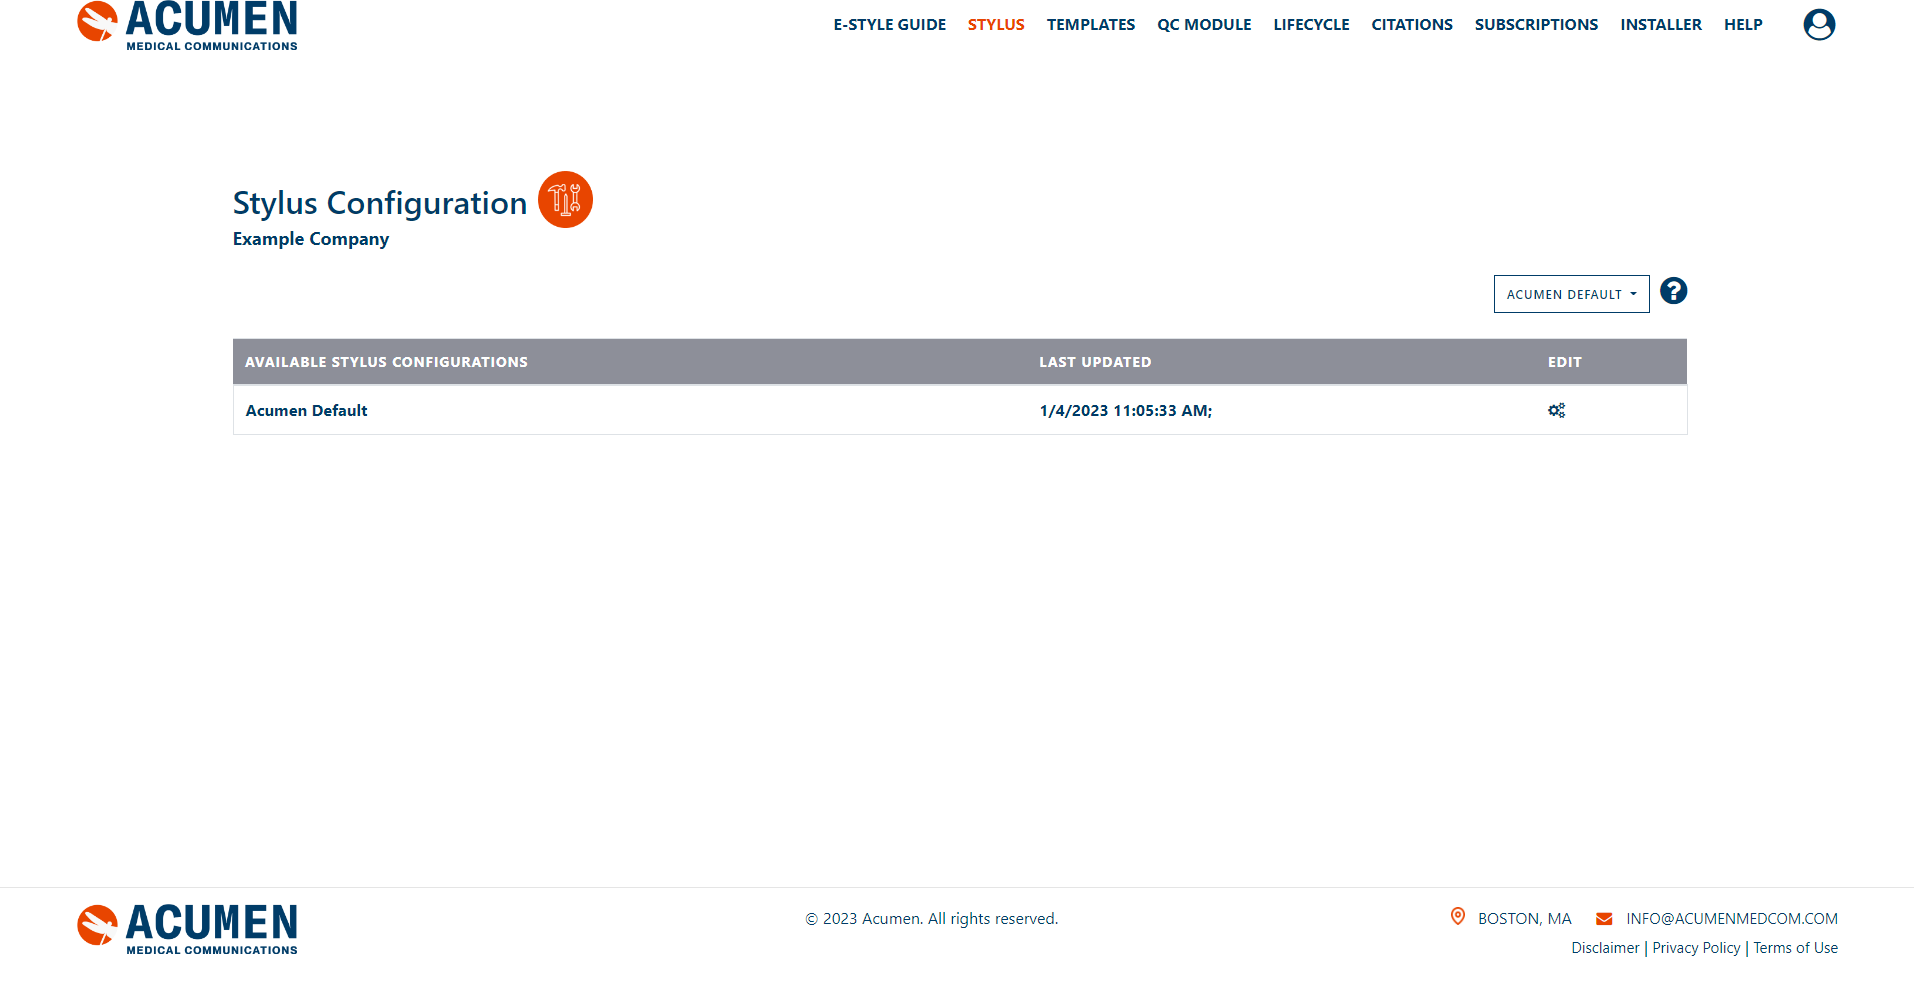
The Stylus page is where users, if they have the Stylus Tool available, will be able to view styles created utilizing the Style Editor Tool on their own device. Users can remove or delete styles present on this page. By default all users will be given a “Acumen Default” Style to utilize.
Templates
View our dedicated templates guide page under the Templates page for more information.
QC Module
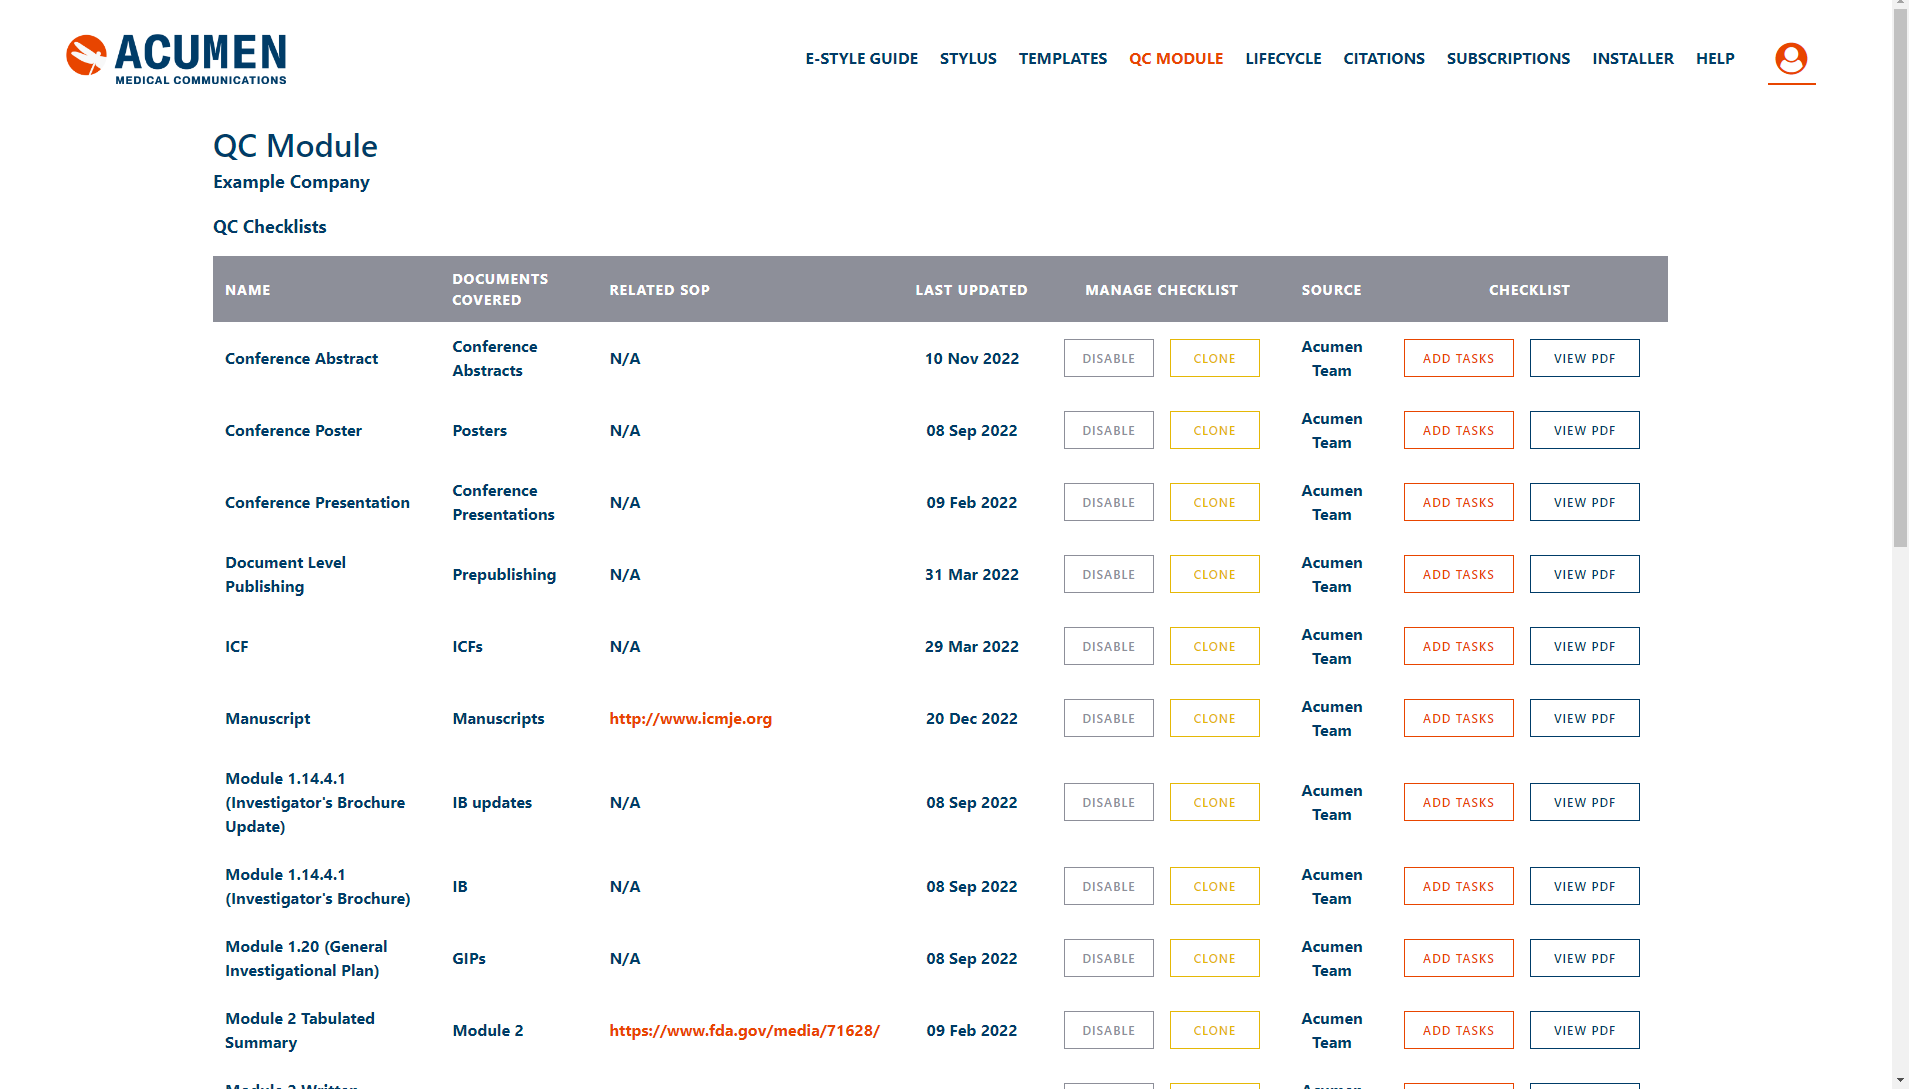
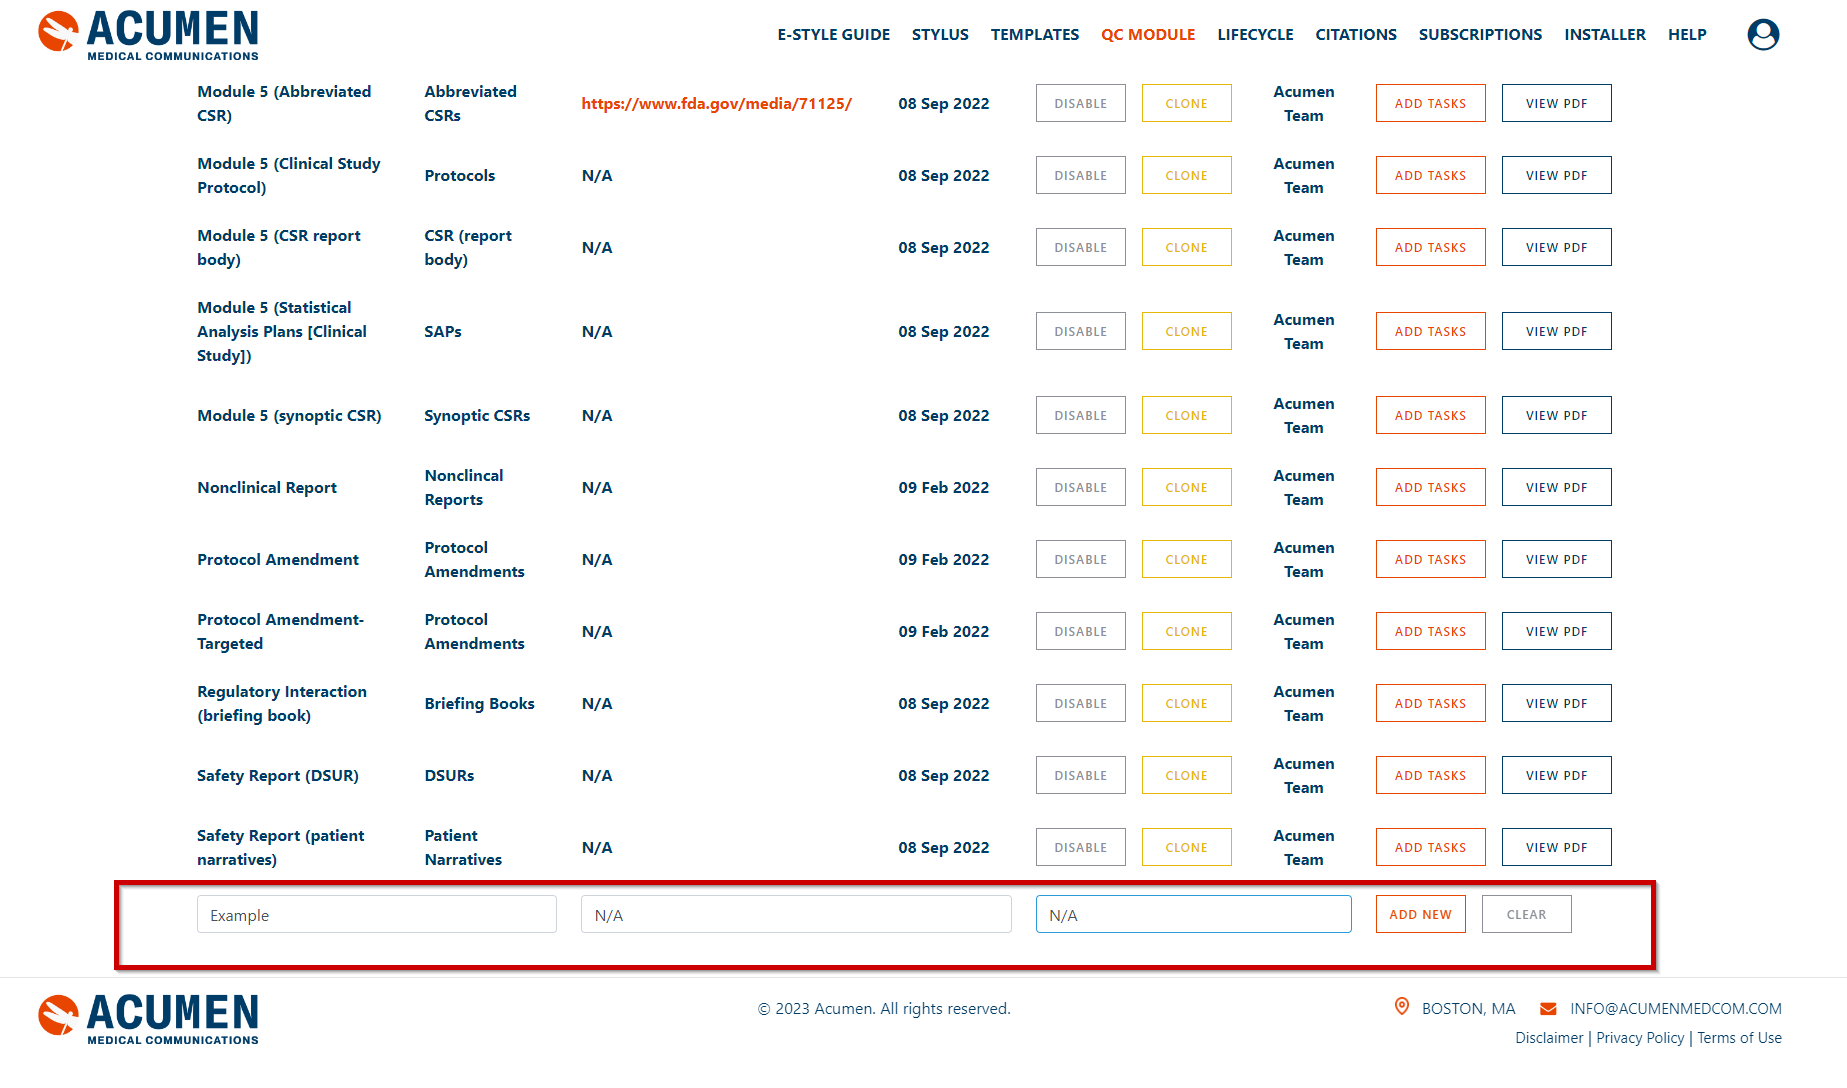
If you have brought the QC Module Tool than the QC Module page is where you can create or edit QC Checklists you have. By default we offer an assortment of QC Checklists which you can either use as is, clone or change as you wish.
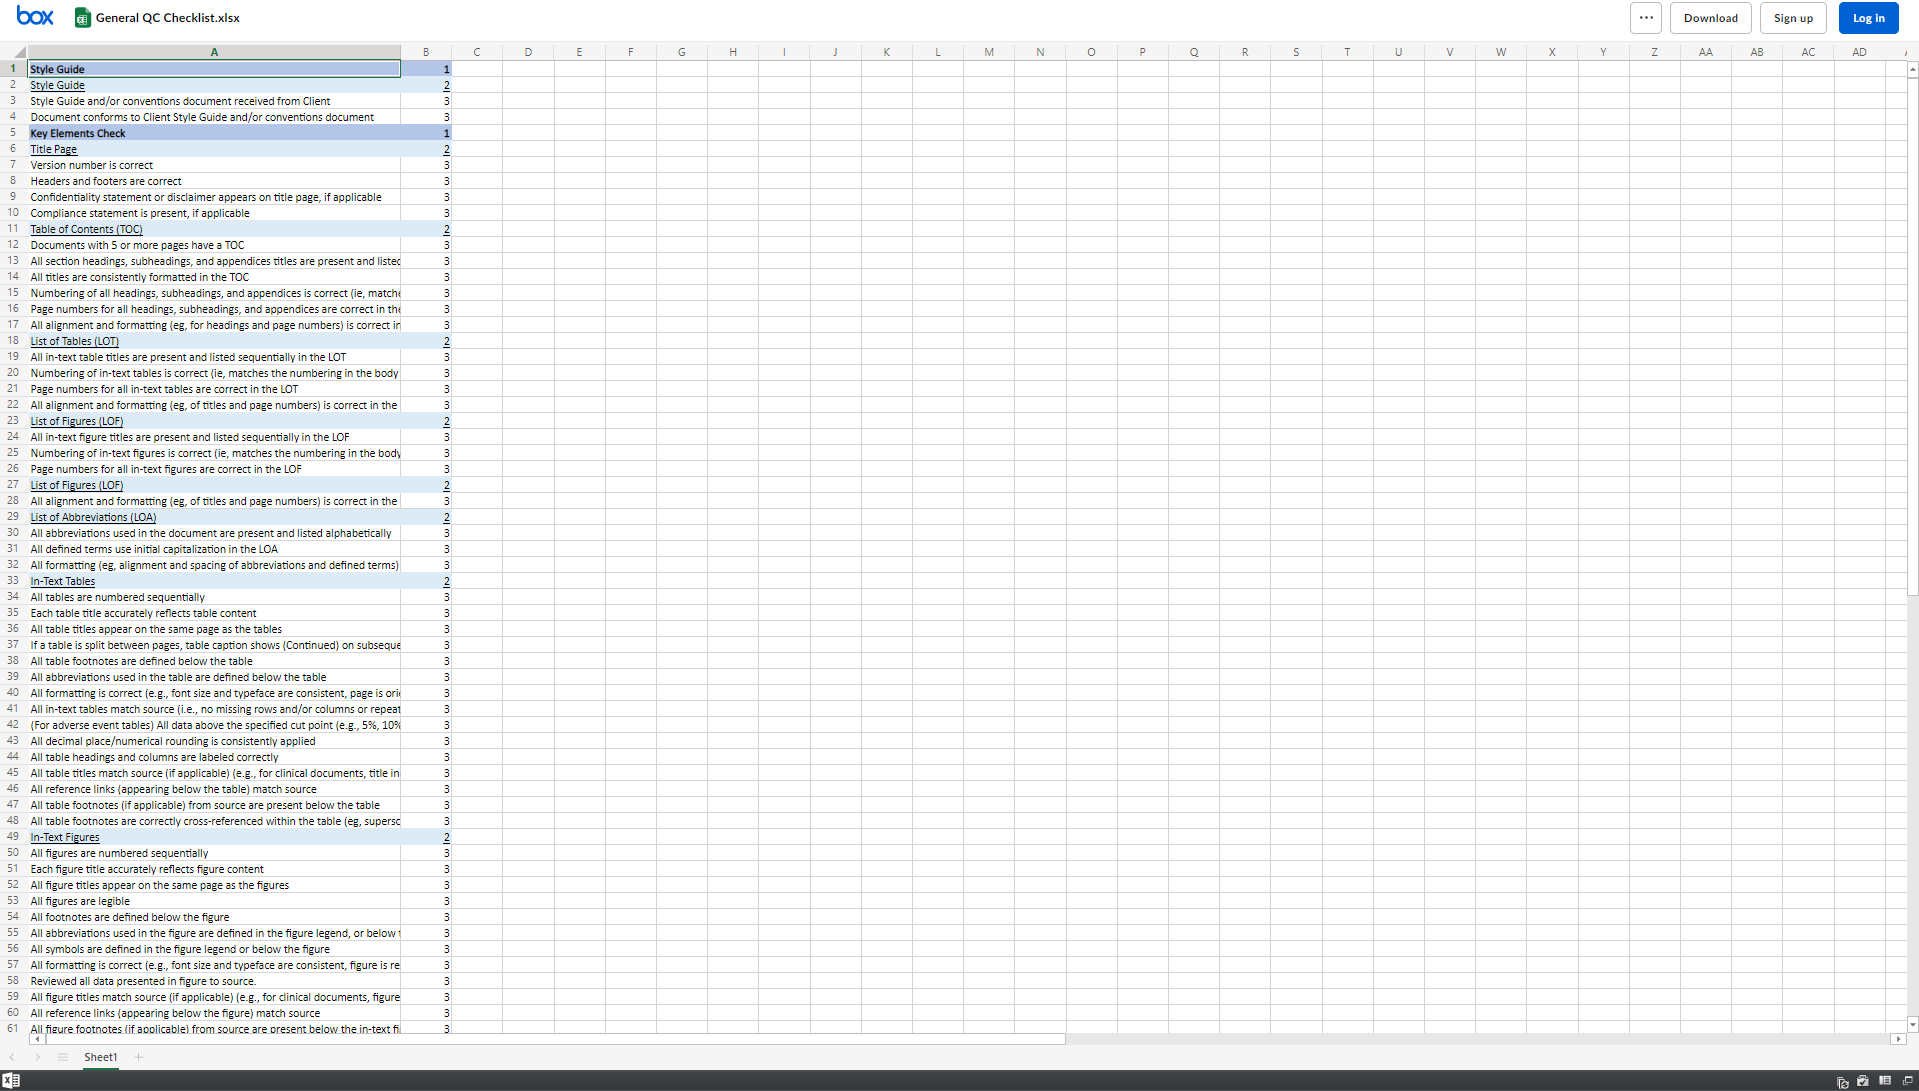
Each list has multiple options available. Starting from the left is the Disable button which as the name suggests disables the use of the QC Checklist on the Acumen Tool. Next is the Clone button which creates another exact copy of said QC Checklist for users to edit / use as they’d like. The Add Tasks button allows users to edit the QC Checklist. Users can delete, edit or add tasks to a Checklist via this feature. Lastly is the View PDF button which allows users to view their QC Checklist in a easy to read format.
Scrolling down to the bottom of the page users can create their own QC Checklist from scratch. All that is required is a Name, For Documents Covered and SOP it is up to the user to put down the name, if not applicable users can simply put down N/A for either option. Once all set click Add New to create your QC Checklist.
Citations
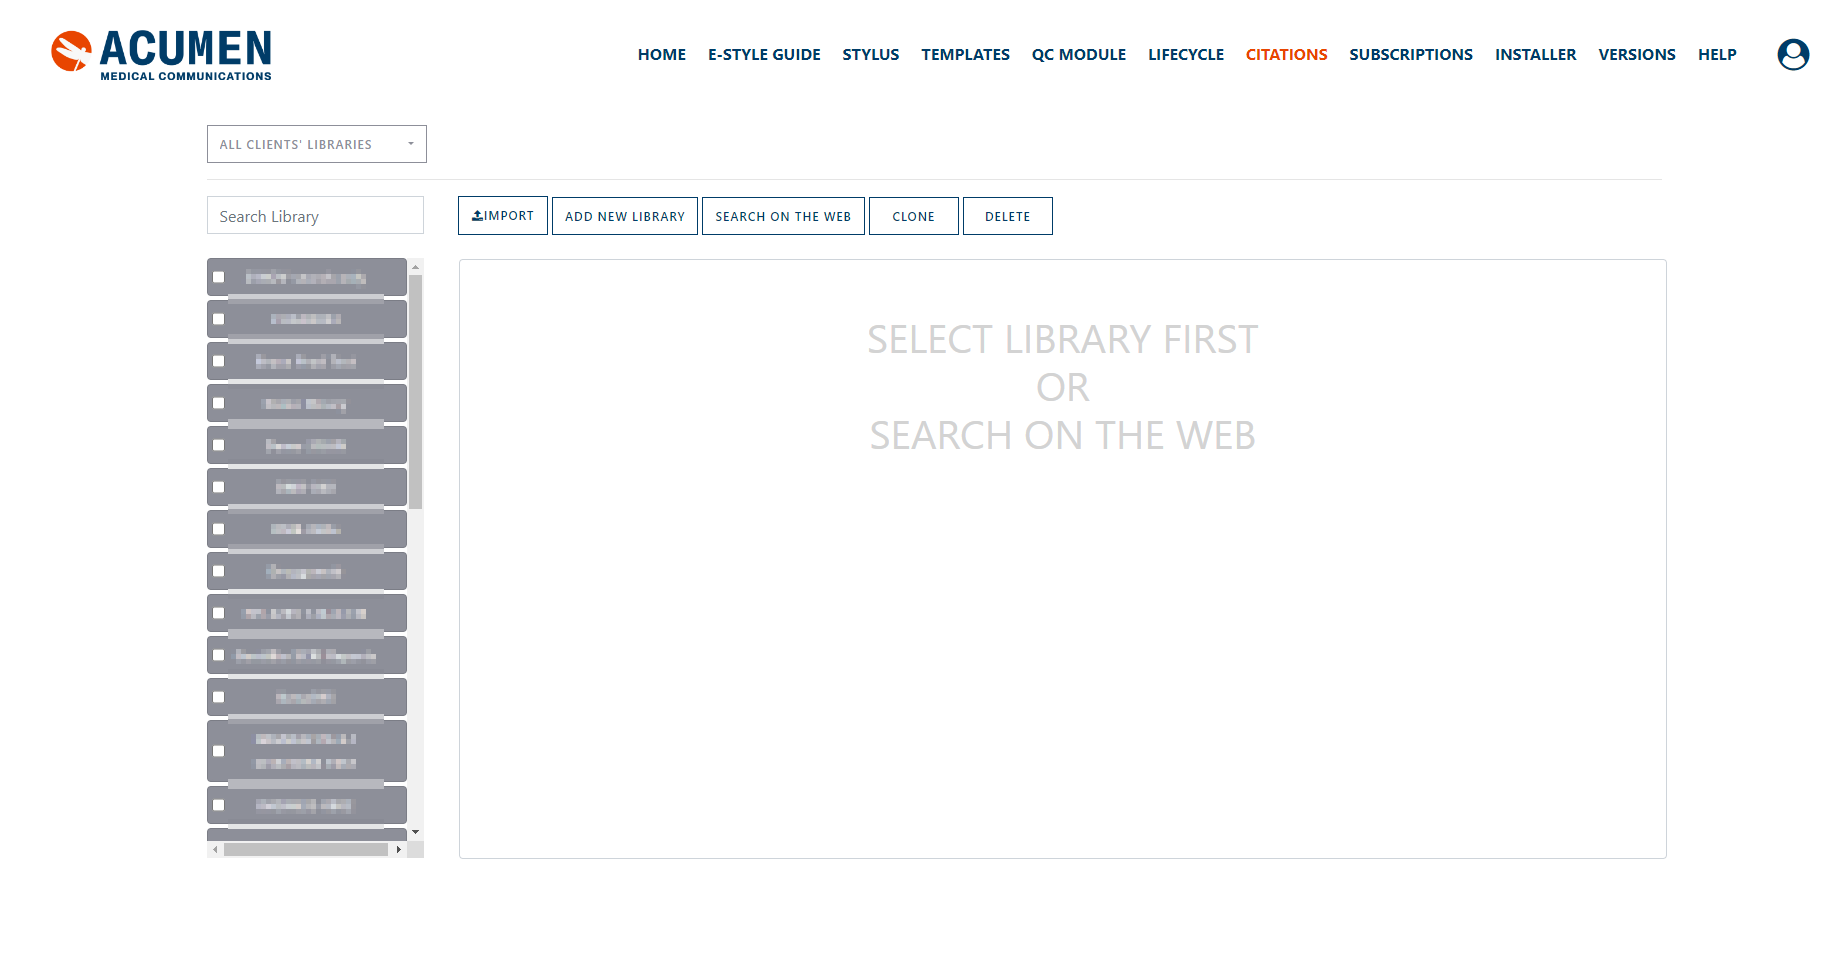
The Citations page is where clients with access to Citations can create, clone, import, delete and edit Citation libraries.
Add New Library
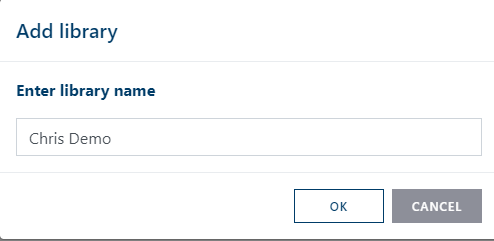
To create a Library you can click on the Add New Library button found on top of the page.
You’ll then be prompted to give the library you wish to create a name.
Delete Library
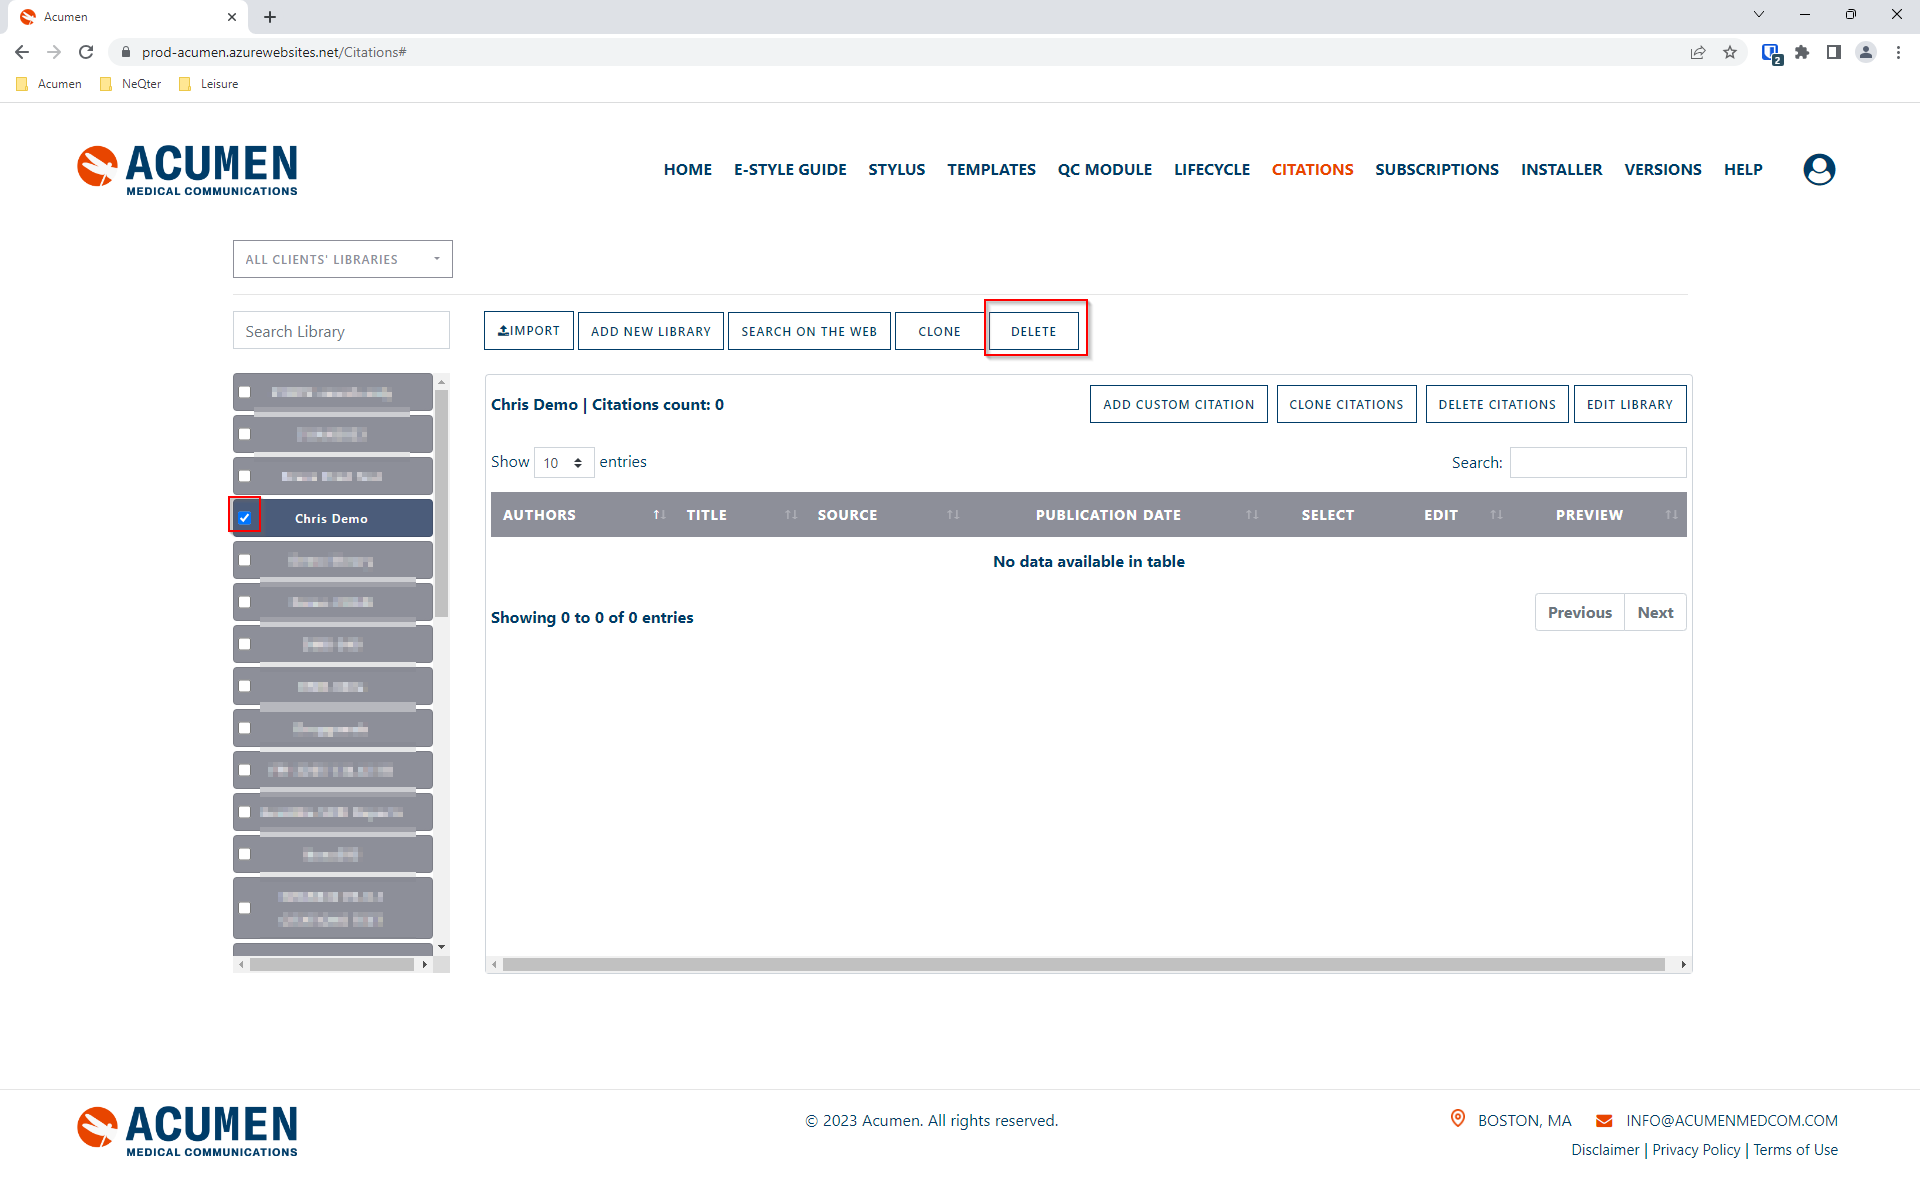
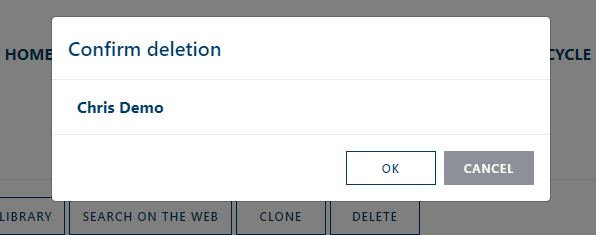
To delete a Library, you can select the library or libraries that you’d like to delete on the left hand navigation bar and then click Delete on top when ready. You’ll then be asked to confirm and once confirmed the selected libraries will be removed.
Clone Library
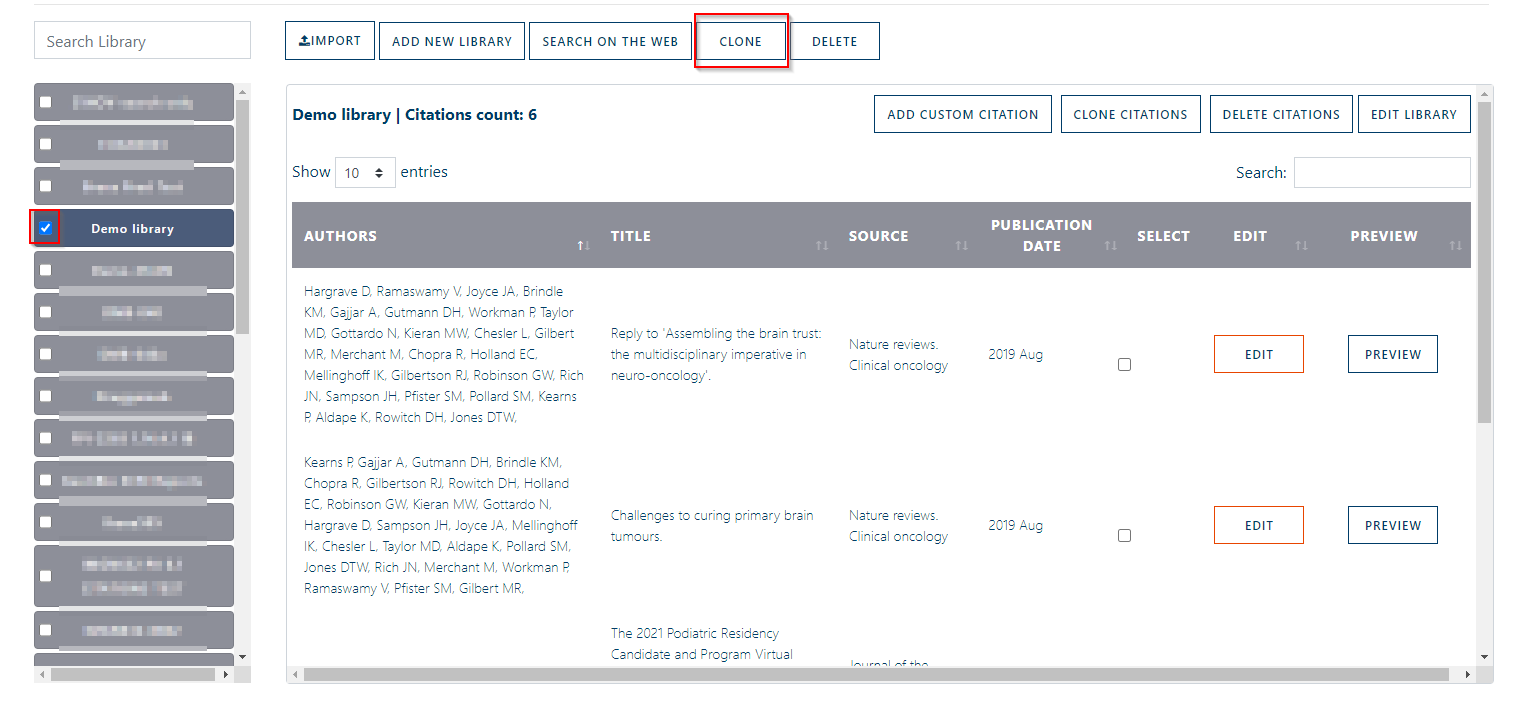
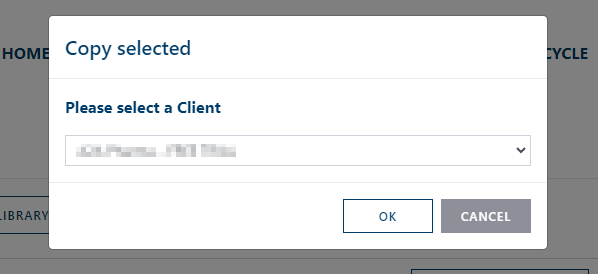
Cloning a library follows a similar process to deleting. First you select the library you’d like to clone and then click the Clone button on the top of the page. You’ll then be asked to select which library you wish to copy the contents of your select library to.
Search On The Web
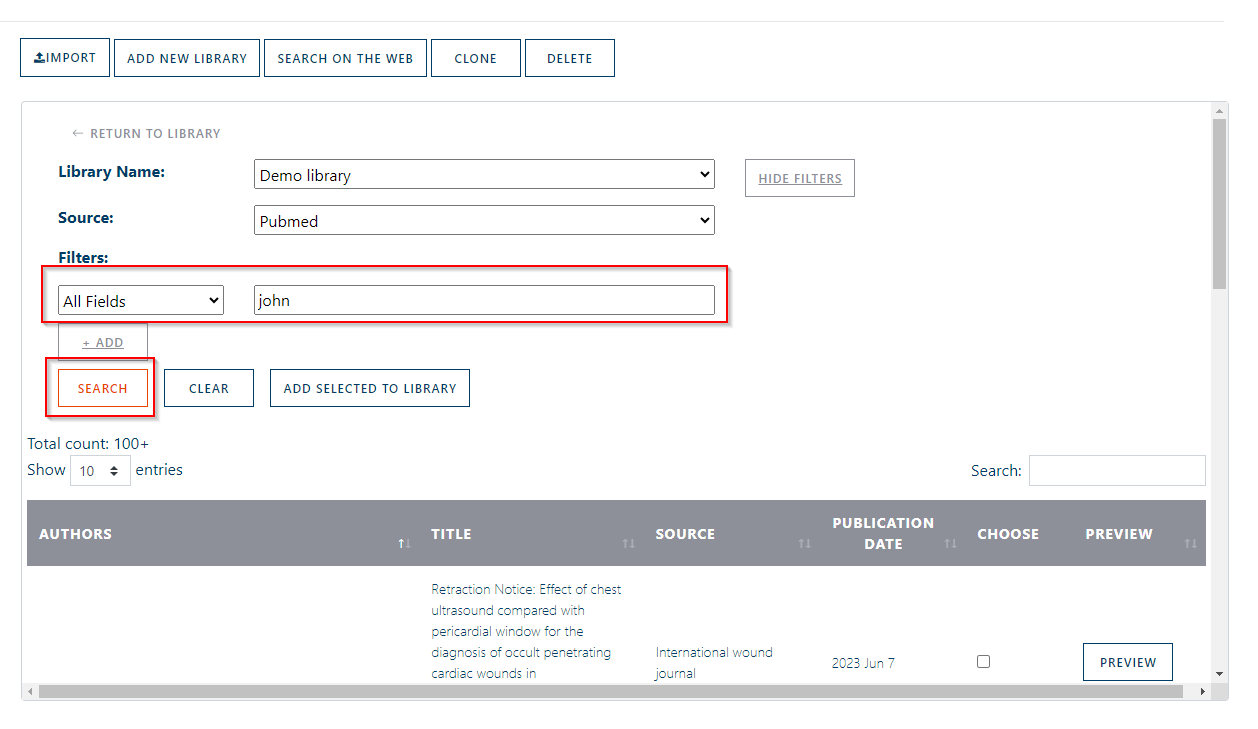
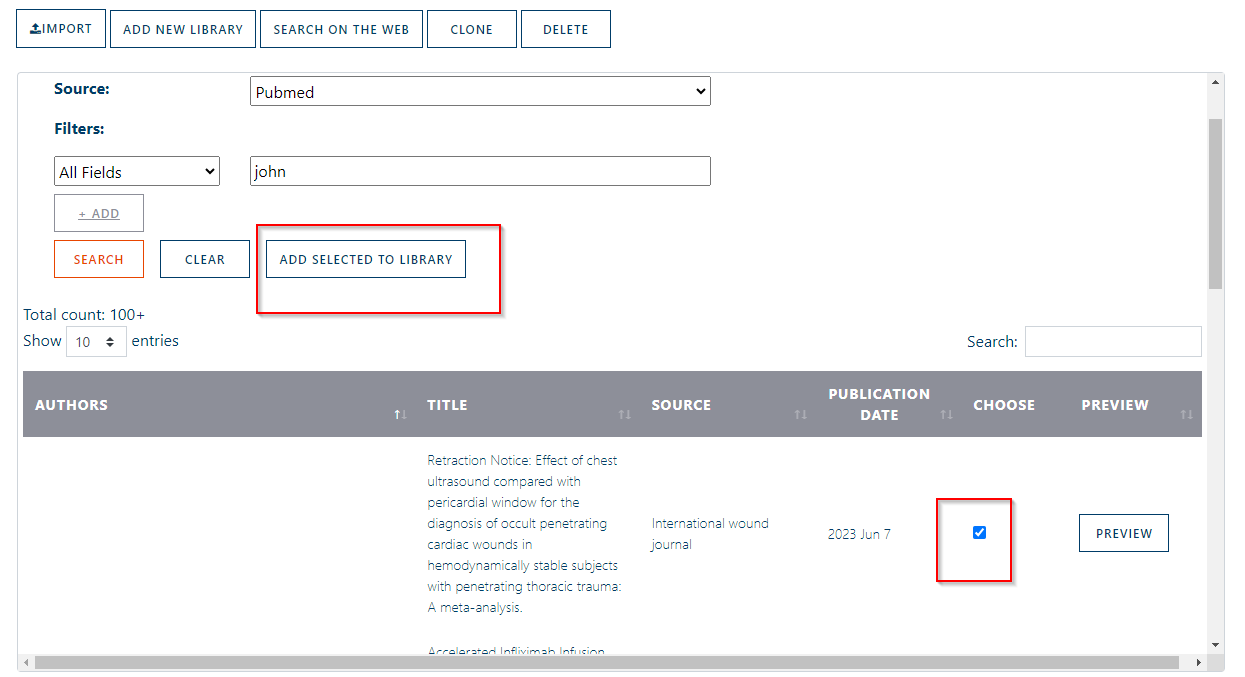
Users are able to look up pubmed article references directly from within the Acumen’s Website by clicking on the Search on the web button on the top of the page while having a Library open. Users can filter for names, dates and any other relevant details found in the article and when ready click the Search button in order to have articles that match said filters pop up.
Once the article(s) the user is looking for is found they can then select the article(s) they wish to add and then click the Add selected to Library to have it added to the selected library.
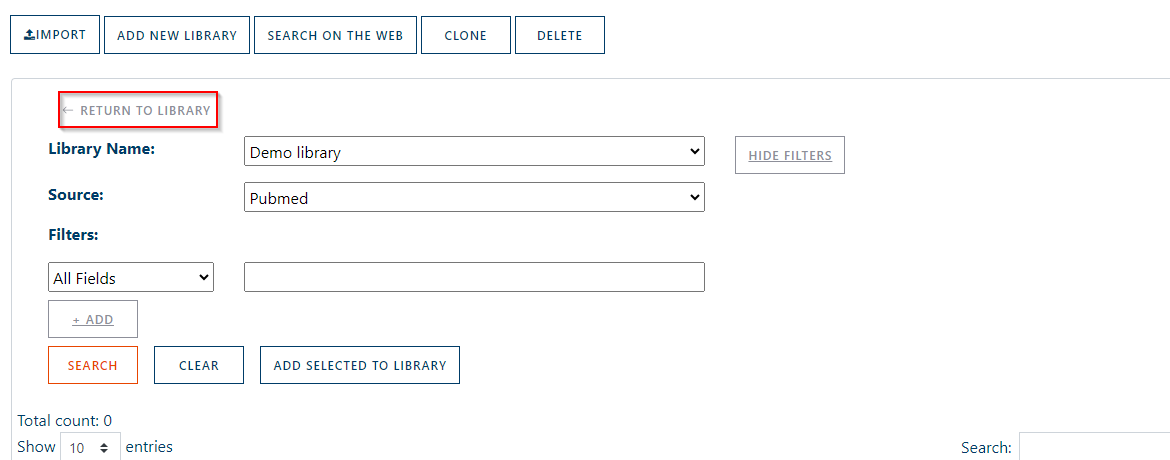
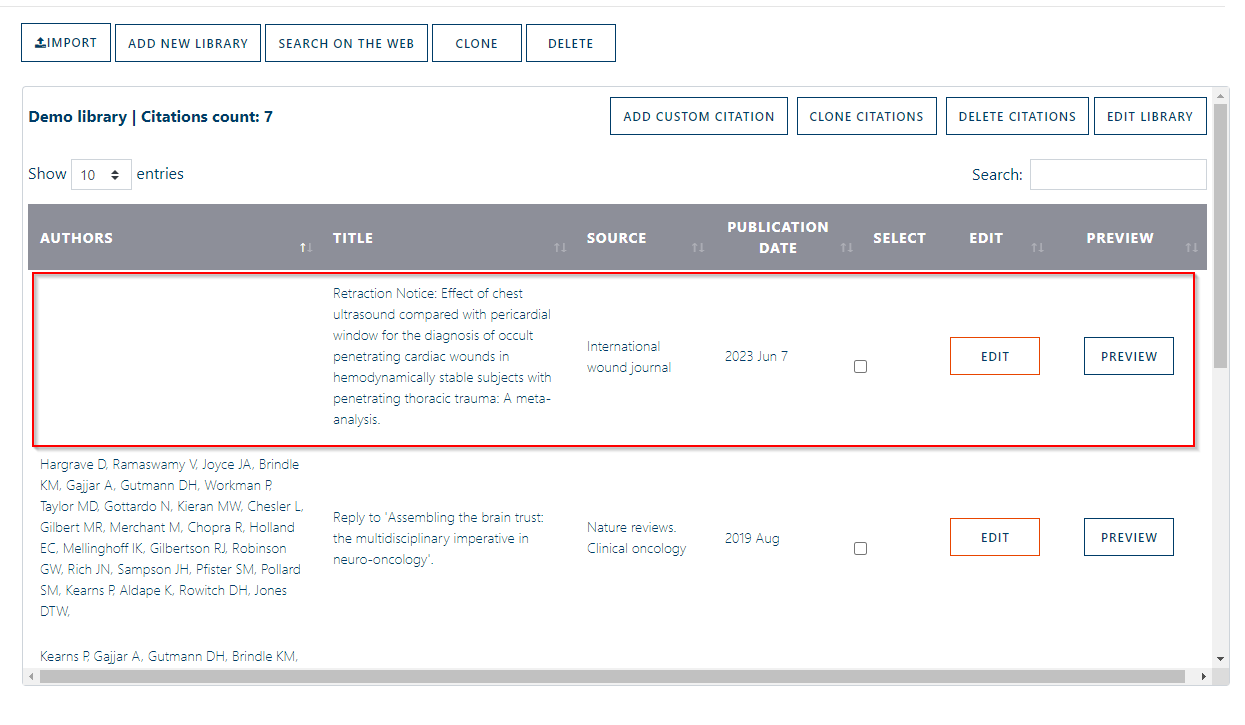
Clicking Return to library in the top left will bring you back to the libraries articles where you should now see the one you’ve add.
Add Custom Citations
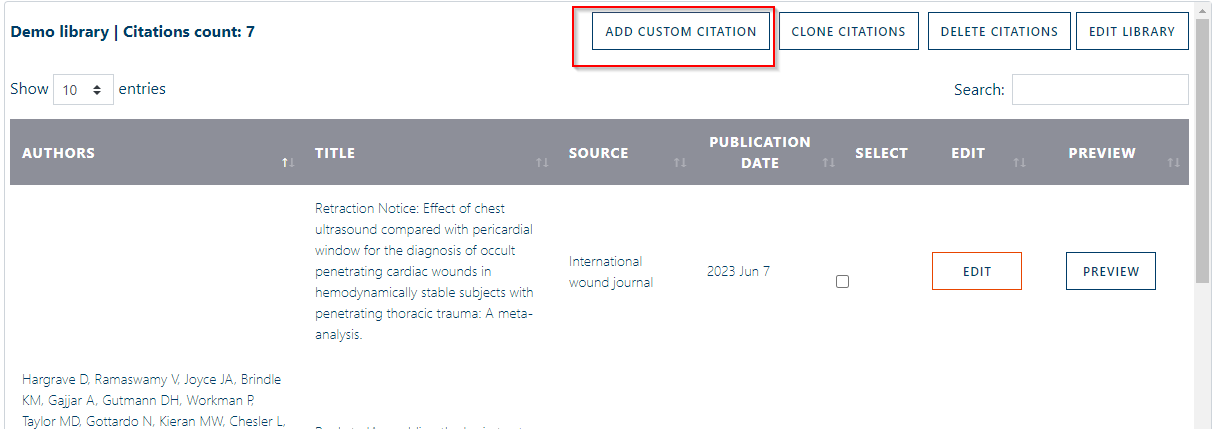
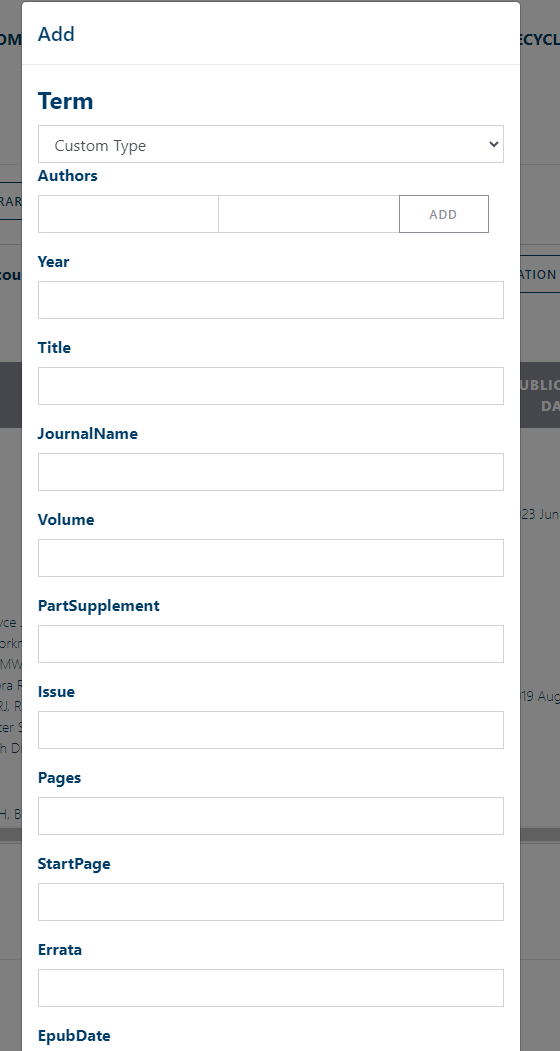
Users are able to add custom citations to their Library by clicking on the Add Custom Citations button.
You will then be prompted to select the type of citation you’d like to use and then fill in the relevant data that you are able to. Once finished click on the Save button on the bottom of the window to complete.
Delete Citations
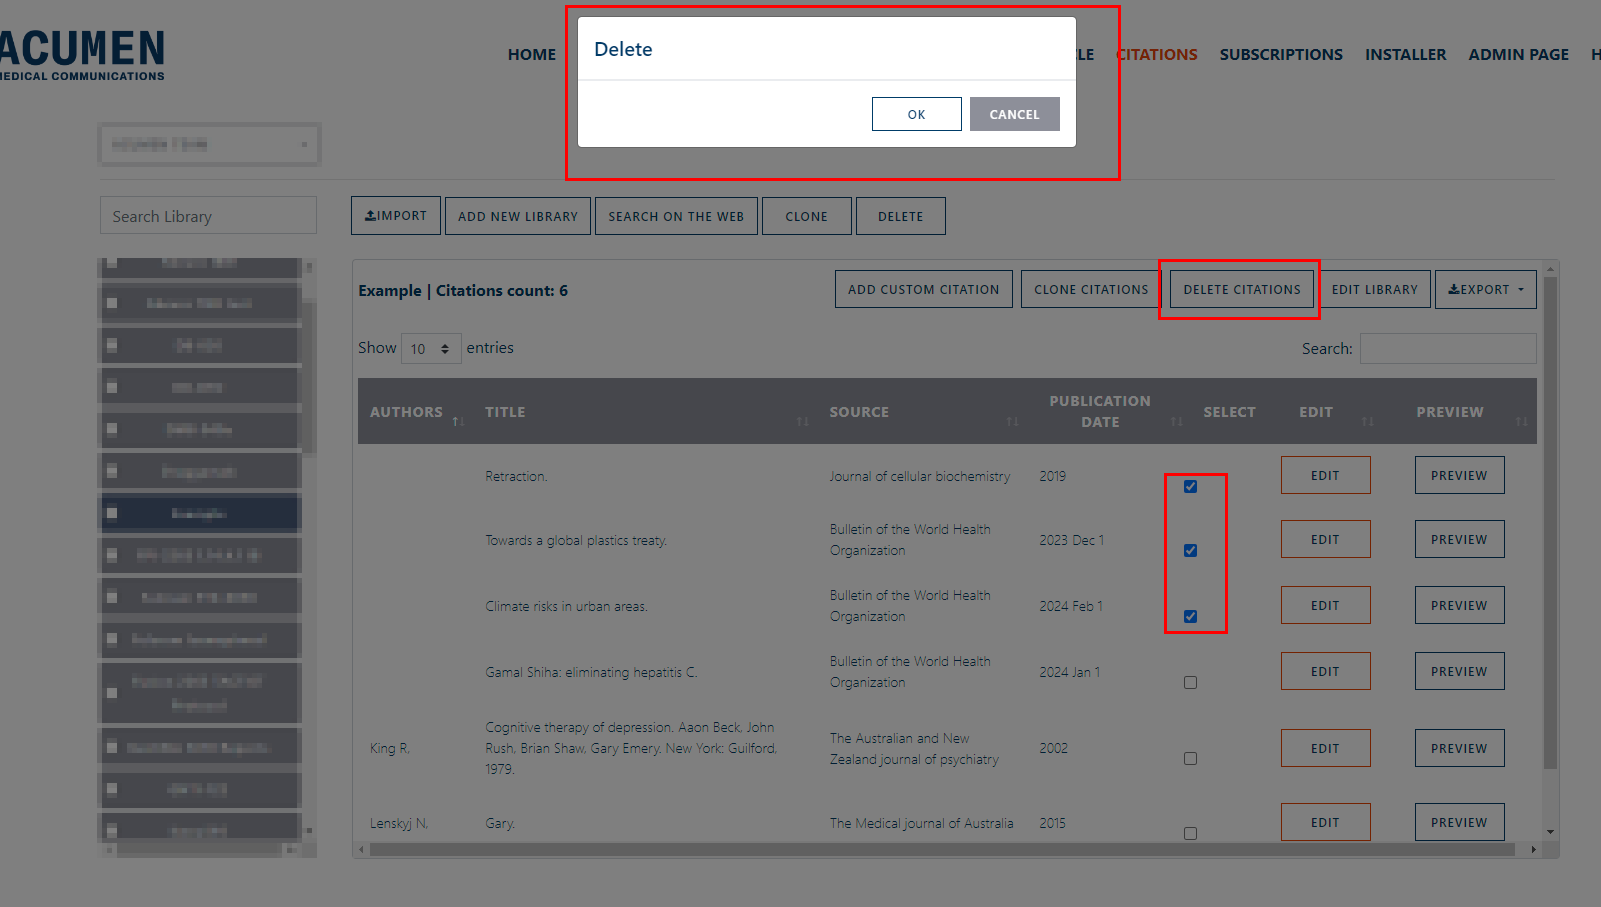
Users can delete citations by selecting the citations that would like to be removed and clicking on the delete button found on the top right of the page’s navigation.
Edit Citations
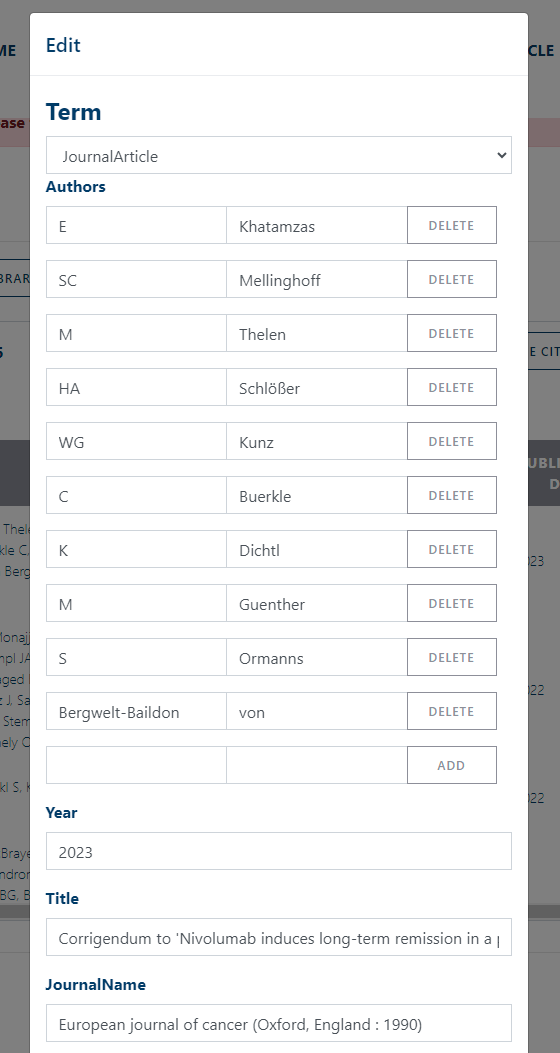
Clicking the Edit button found next to each citation allows users to edit existing citations in their library. From here they can edit any attached detail to that particular citation including authors, title, year, citation type, title, etc.
Once all editing is finished, scrolling to the bottom of the list users can click Save to complete, Cancel to ignore changes made and Delete to delete the citation entirely.
Edit Library
Edit Library allows users to change the name of the library name to a different name.
Clone Citations
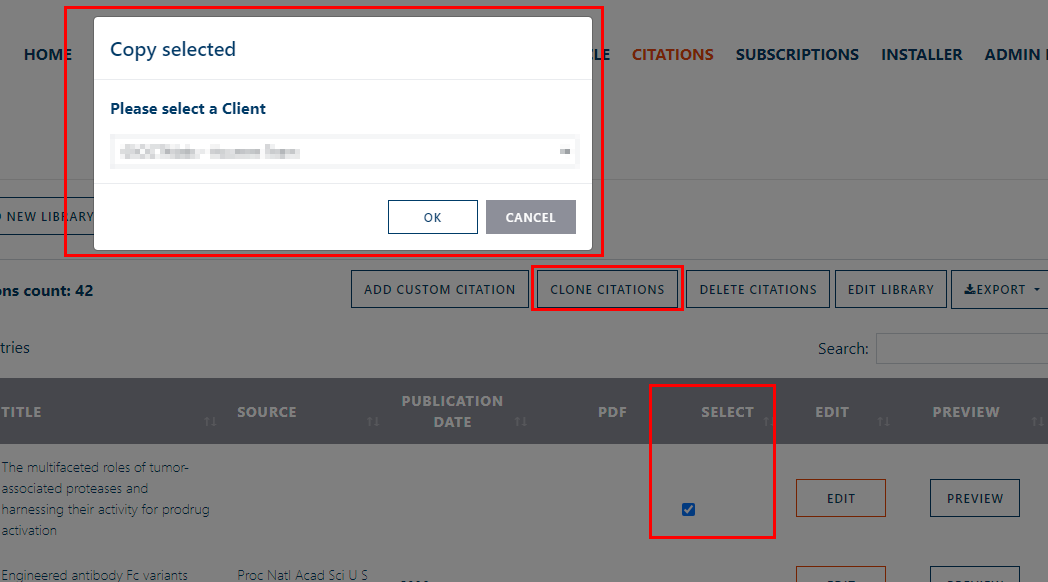
Clone citations button allows users to clone the selected citations over from one library to another.
Import / Export
The Export tool allows users to export an xml file containing their entire library. This exported file can be used to either import settings directly into word for use in a local citation library or imported onto another cloud library via the Import button.
On the AcuCite tool users can also export an xml library file and import it into a cloud library as well.
Word Toolset
All features found on the citations WebUI page also play a critical role with our Citations Tool found on Word. For more information on how to utilize citations in word see our Citations User Guide for more details.
Subscriptions
This page is where users can add, edit or change certain settings for their own subscriptions. You are able to change the email and password of your login. Add Editors who are able to utilize certain features of the Acumen Toolset not typically available to average users (such as the Stylus Editor) and change the login credentials for average users trying to login via Acumen’s Computer Software.
Last but not least users are able to manage devices on the bottom of the page. The Manage Machines button allows users to see a list of devices with a active subscription, users can remove subscriptions that are no longer needed, see the amount of seats available and see when their subscription ends.
Installer
The Installer page is where users can download Acumen’s Software Installer to their device. For further information on how to install Acumen’s Software, check out our Install guide.
Help
The Help Page provides contact info in which you can use to contact Acumen’s Support Team for further assistance.
