![]()
Acumen User Guides
AcuCite Guide
Once the Acumen Smart Document Solution software is installed and you re-open Microsoft Word, the “Acumen” tab will appear in the top ribbon of the Word application. This is an access point to activate all of the Acumen Smart Document Solution features and the activation of this is detailed in the Getting Started Section of the documentation.
Once the appropriate credentials are entered, new tabs will be visible in the ribbon based on the features in your subscription. If you do not see the Citations section on the top ribbon, please log out and log back in (using the supplied credentials).

Navigation
Starting from the very left of the Citation Navigation Bar and moving to the right we have the following tools:
Show / Hide citation Panel
Clicking on the Show / Hide Citation Panel button brings out the Citation Panel onto display for you to utilize. For more information on using this tool, see our Navigating Citations Panel Section for more details.
Clicking on the button while the panel is open will close it.
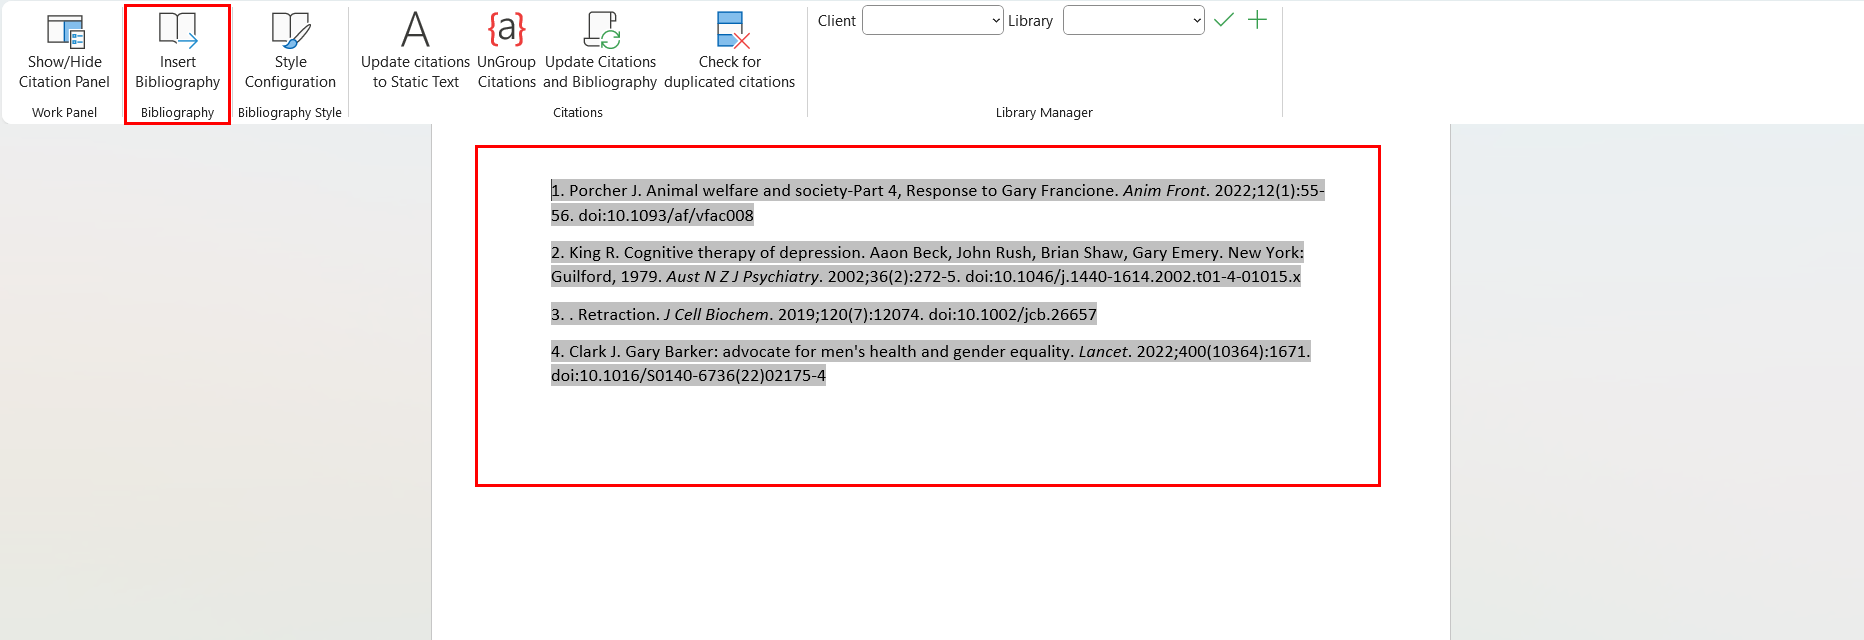
Insert Bibliography
When clicked, grabs all references made throughout document and utilizing your Citation Library creates a Bibliography at the end of the doc.
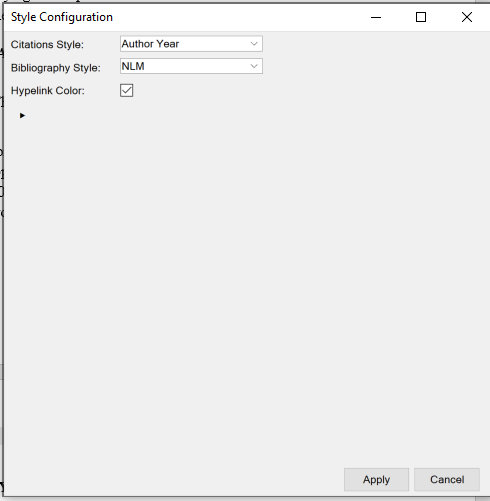
Style Configuration
When clicked, the Style Configuration window will pop up which is where you can choose how Citations will be formatted when placed on the document.
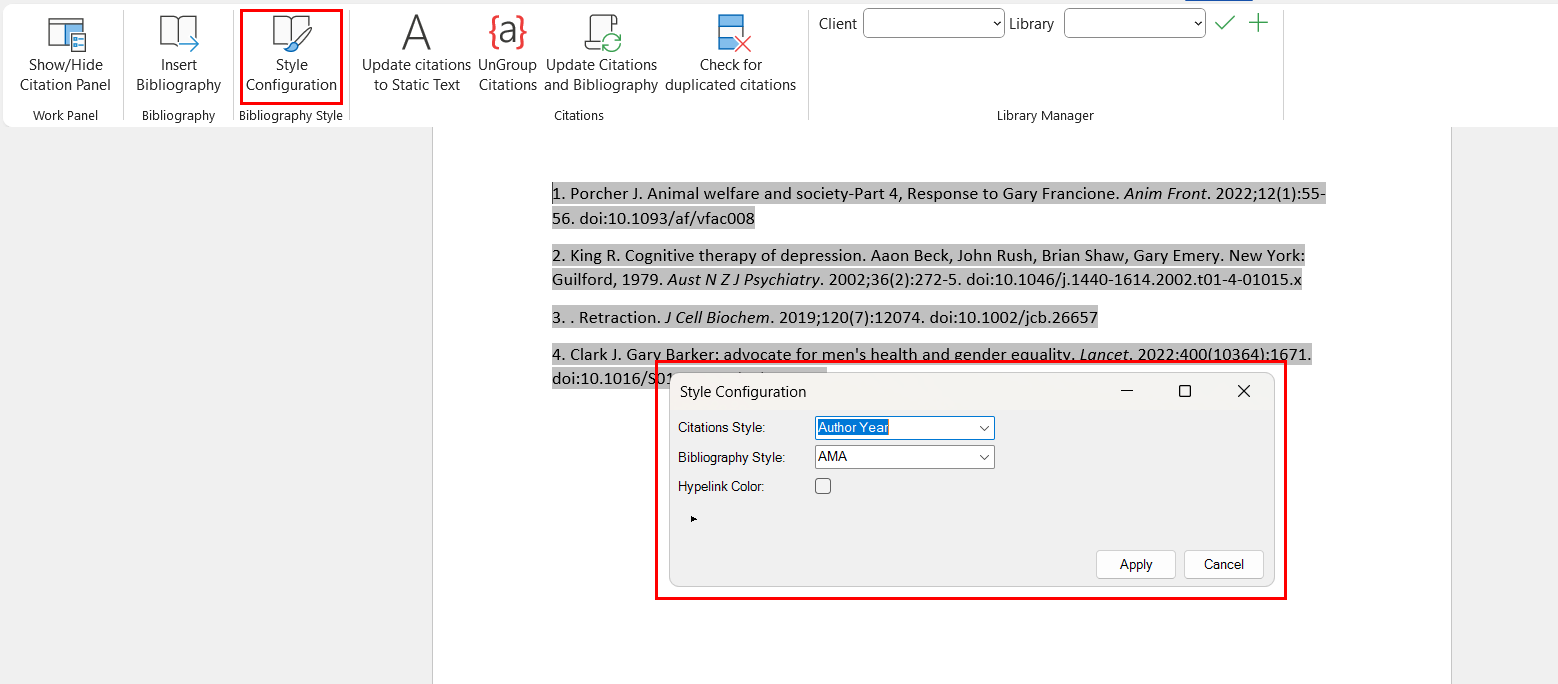
For example, you can change the Bibliography Style from AMA (Its default) to NLM instead with Hyperlink Color turned on.
Update Citations to Static Text
This Tool when clicked will turn all Citation References, which by default are hyperlinked for ease of going between them and the Bibliography to static text.
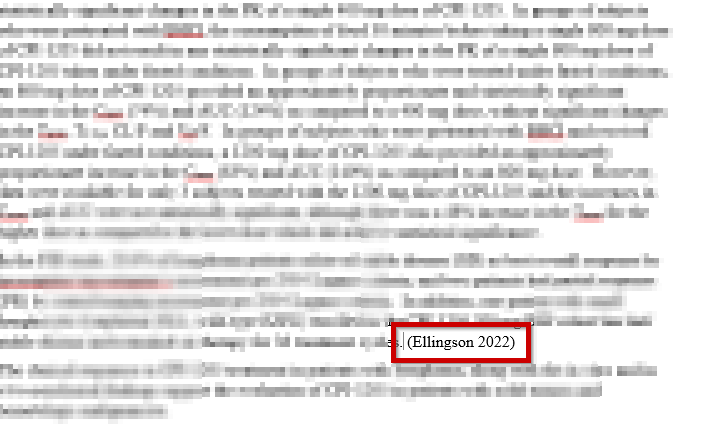
Regular Citation:

Citation made into static text:
Ungroup Citations
When clicked this option un-groups citations that are grouped together into their own separate sections both throughout the document and in the bibliography.
Update Citations and Bibliography
Updates citations and bibliography found in document with latest data. Any new citations added to the document will be added to the bibliography, old / outdated citations will be updated to match the current version found in the user’s library.
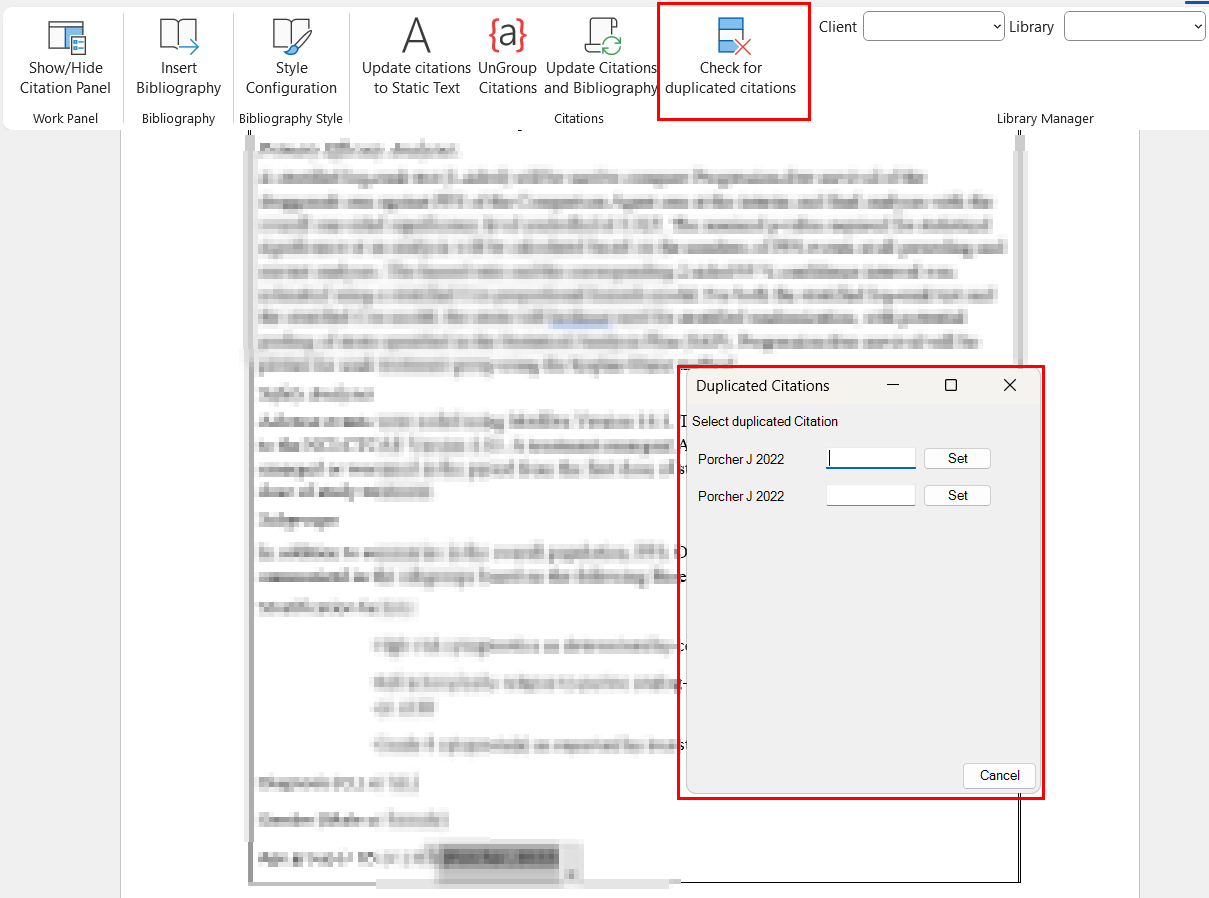
Check for duplicated citations
This option when clicked checks the document for any duplicate citations. Any citations that are detected to be the same but from two different sources will pop up on a separate window which is where users can specify what source to use for either one.\
Library Manager
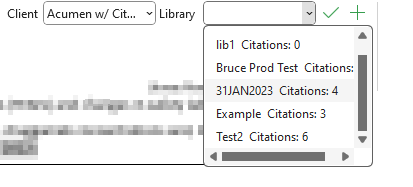
This is where Users are able to select what Library (as well as Client if user has access to multiple clients) in which they wish to use for Citations. To do so, users can select from the Client drop down which client (if applicable) the library is found under and then from the library drop down select which one they’d like to use. Then click the checkbox to start loading the library configuration.
Users are also able to create brand new libraries by clicking on the Create New Library (The + Symbol found next the Library Selection) which resets your citation configurations to default.
NOTE: For more information on where the database these libraries can be found under, see our citation’s section on the WebUI Guide
Navigating Citation’s Panel
The Citation panel is where users are able to quickly add new citation references and then utilize said references in their document(s). To do this, the panel gives users the ability to import citations from pre-created Libraries, by grabbing them directly from PubMed or by creating their own custom citation. From there users are able to use the citations they’ve added to their local library and add them as to their document(s) as needed with styling handled by the citation tool itself, helping users cut down on time needed to cite sources for each section of their document(s) considerably.
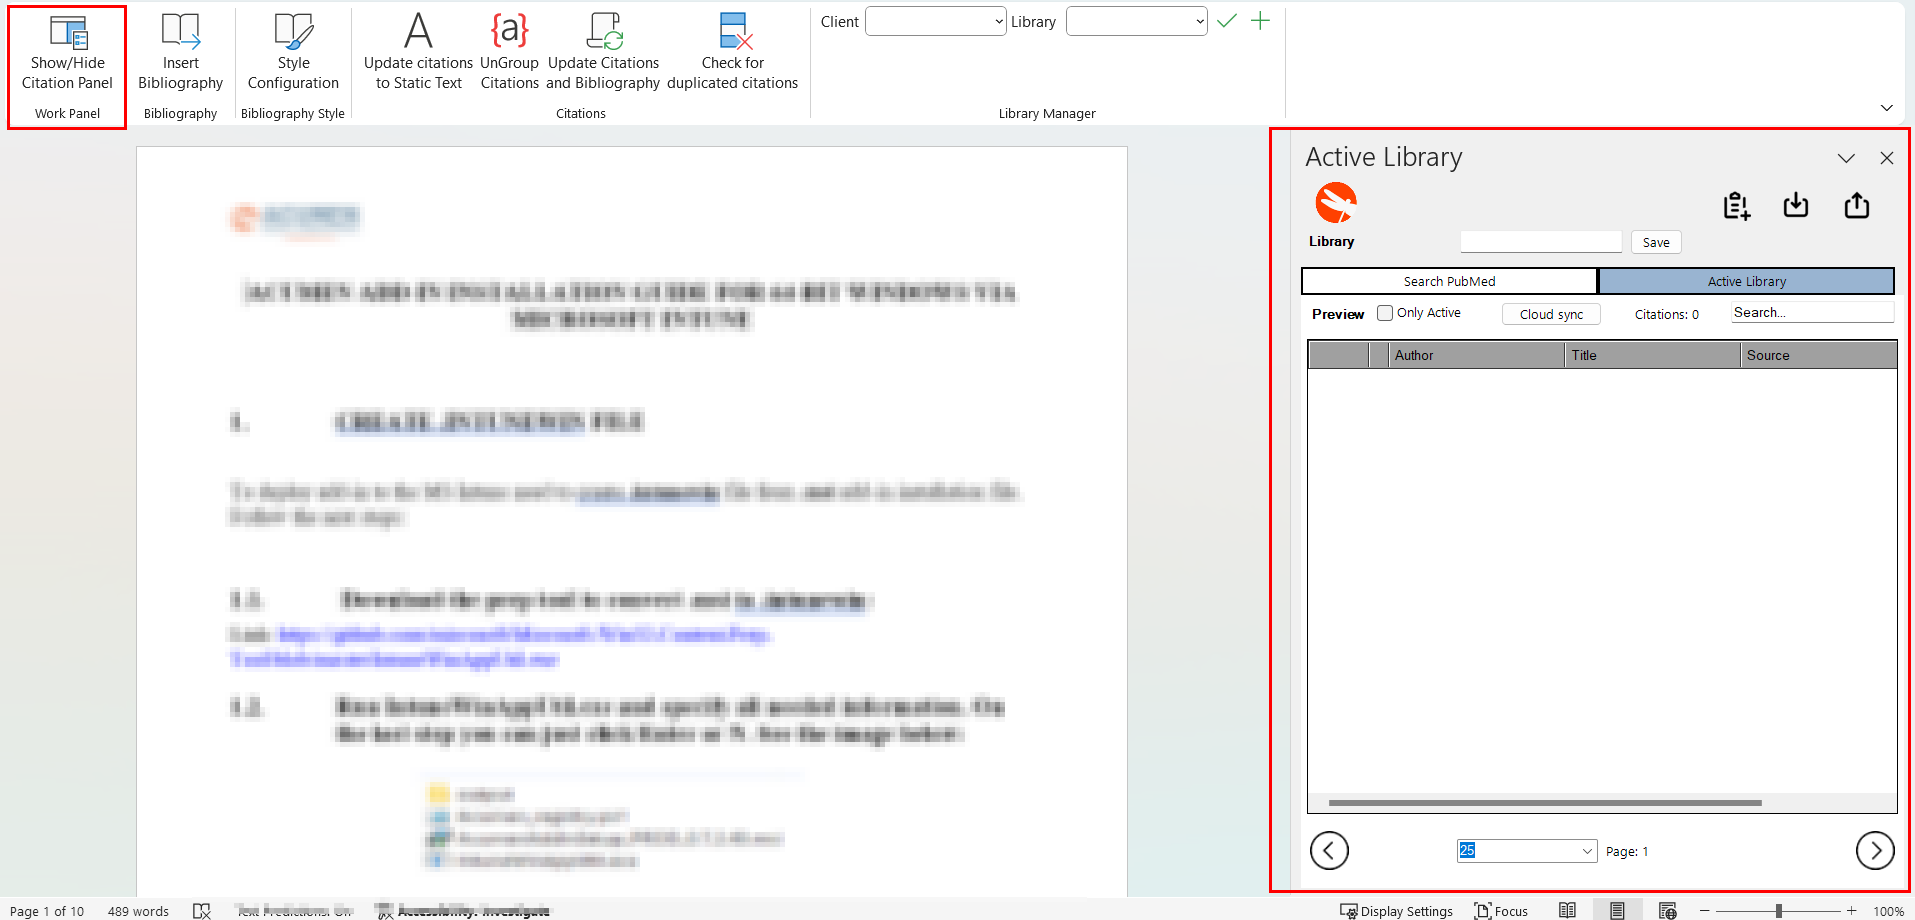
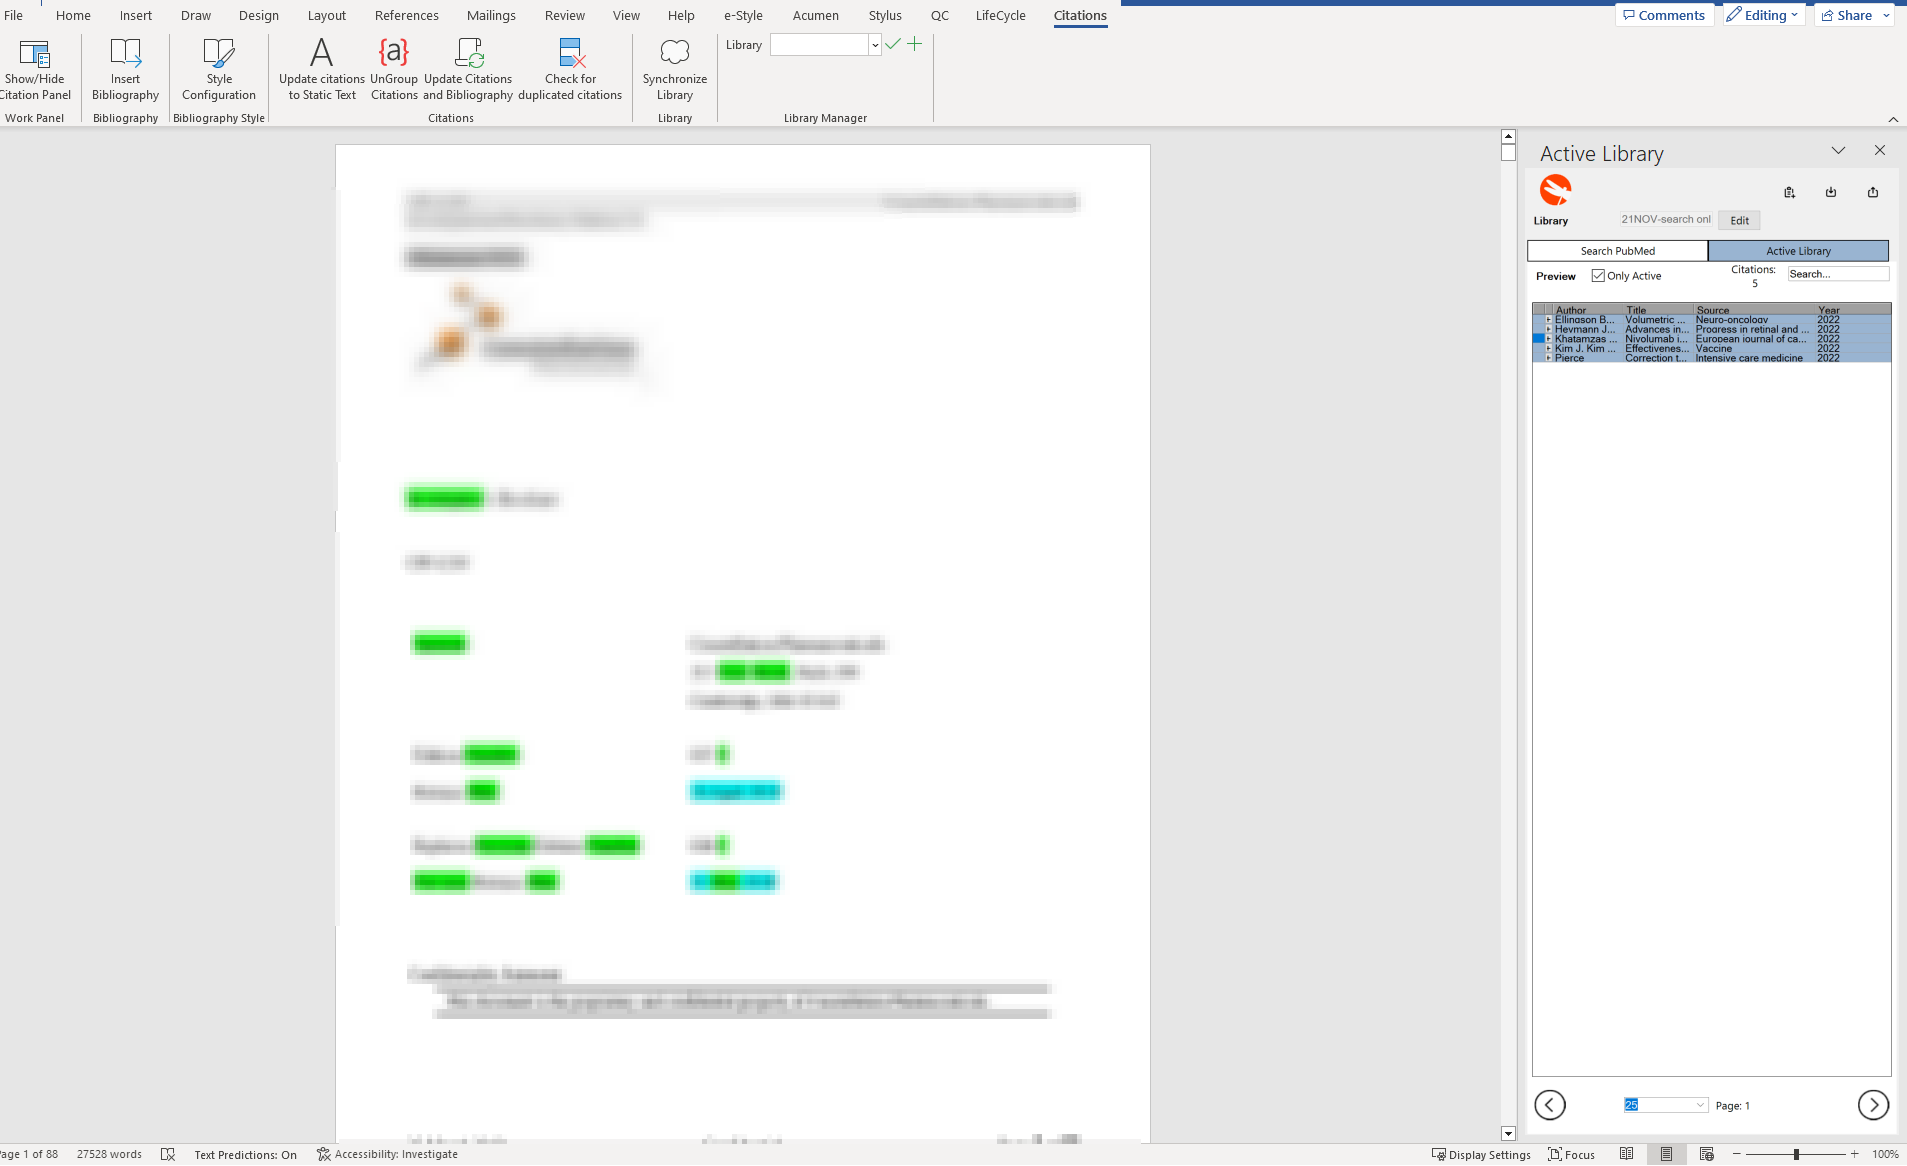
Active Library
The Active Library section shows users a list of citations that can be used / is currently in use for their local document. This Library can be made up of either citations added locally via PubMed, citations added by a pre-configured library, custom citations or a combination of the three. All citations found will be put on down in the citation list, with Author, Title, Source and year available as a quick reference. It is from here that users can add them directly to the document by clicking on the plus + symbol found next to each citation.
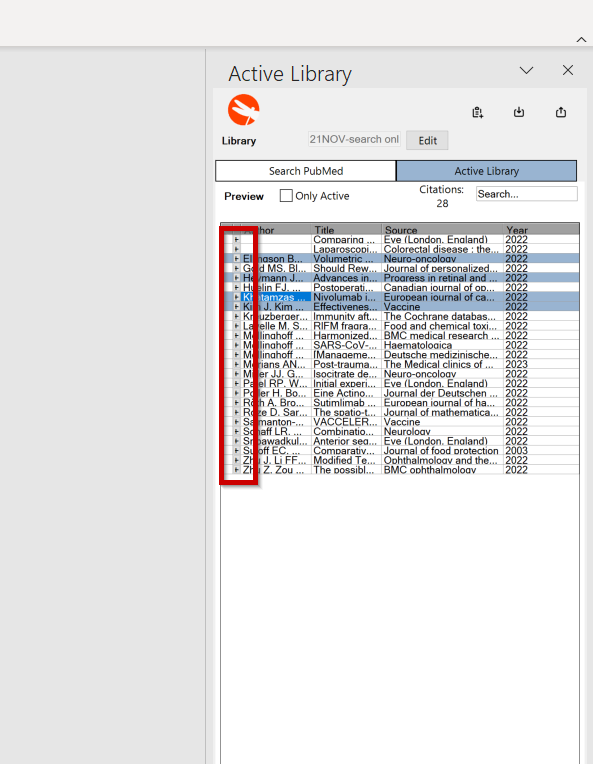
Users can also edit these citations, export, delete or navigate to them by right clicking on each citation.
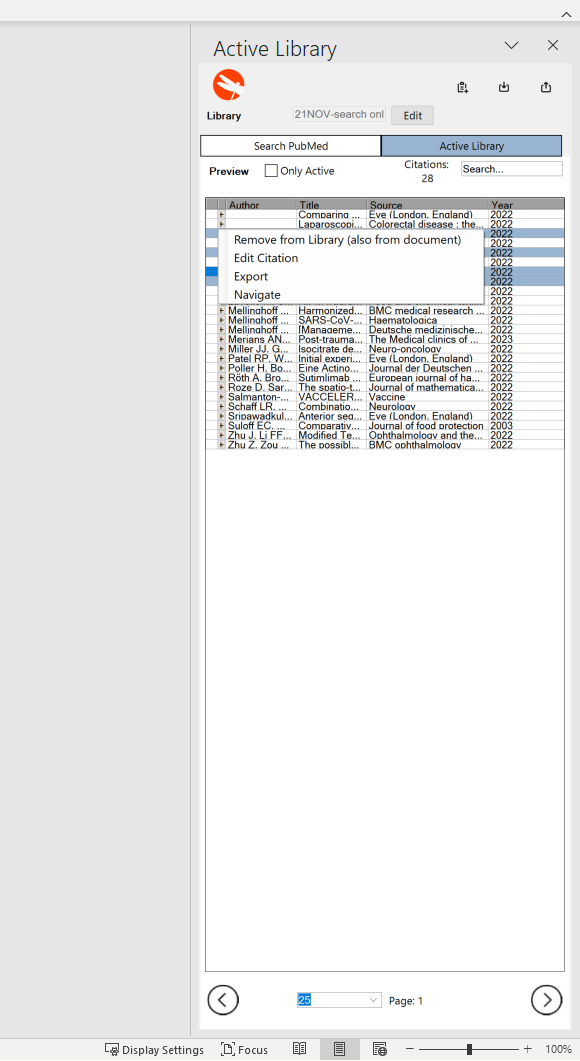
Above the citation list is a search bar where users can quickly search for a particular citation they need as well as a checkbox which when checked will make the list show only citations currently in use by the local document.
Search PubMed
The PubMed tool allows users to look up citation sources directly from PubMed without needing to leave their word document. Utilizing the PubMed tool, you can search for needed PubMed Articles by looking up relevant author name(s), Titles, sources, etc. To do this, users can type in the top most search box on the page the keyword they are searching for. After that they are able to from there click the Search to find relevant articles they might be looking for. Users are also able to add more keywords by clicking the the plus sign found next to the search box, users are also able to specify search fields by clicking the drop down found next to each search box.
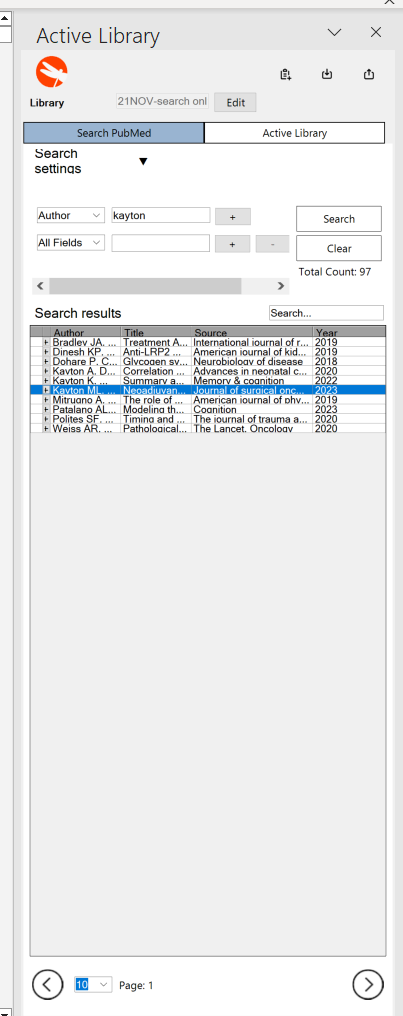
Once a search is complete, a list of articles will be found generated below with a total count found above the table. Clicking on the bottom two arrows allows users to move between different pages containing the data they searched for. Users are also able to increase the amount of items per page by clicking the drop down found near the bottom.
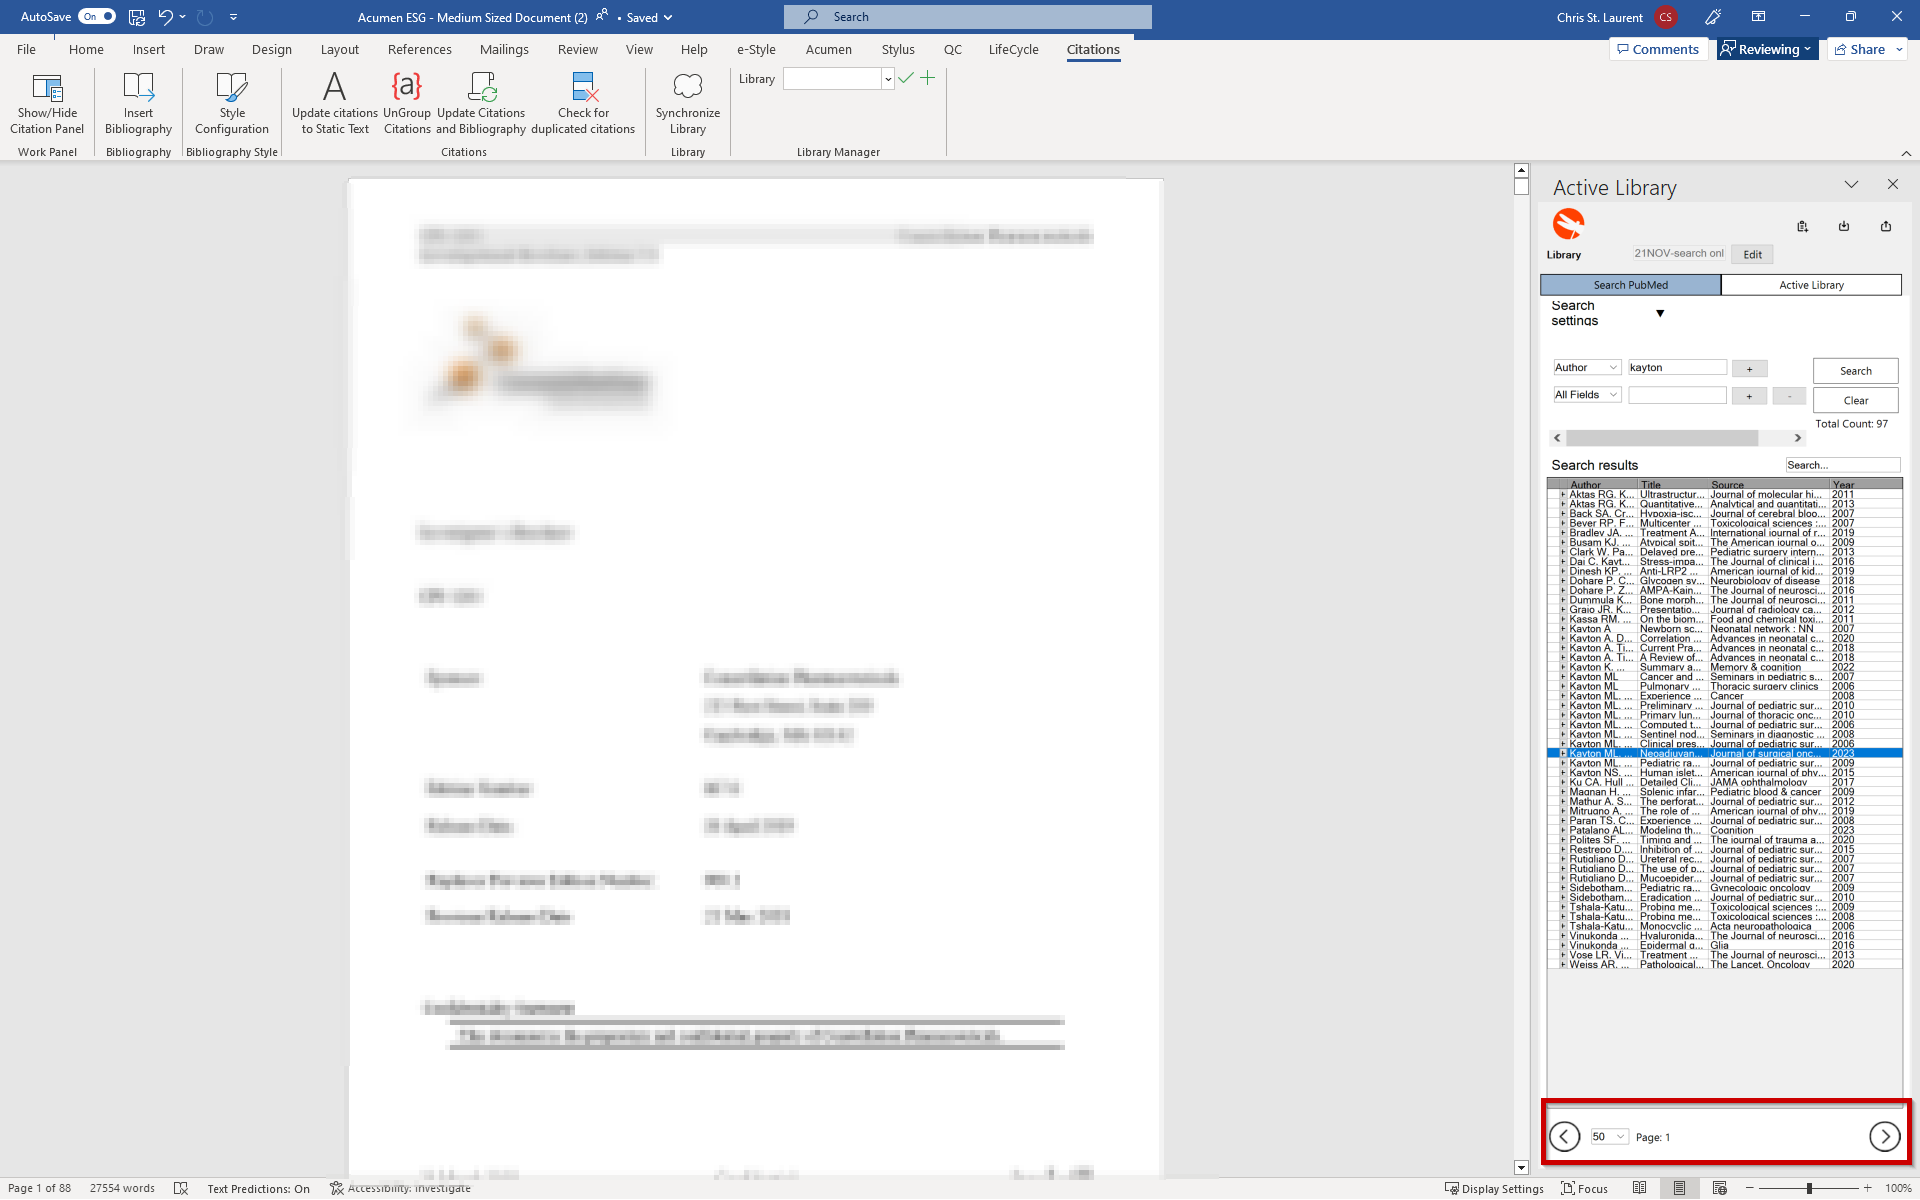
Once the article the user is looking for is found, users can click the plus found next to each one to add it directly to their document or if they wish to simply add it to their active library they can right click on the article instead.
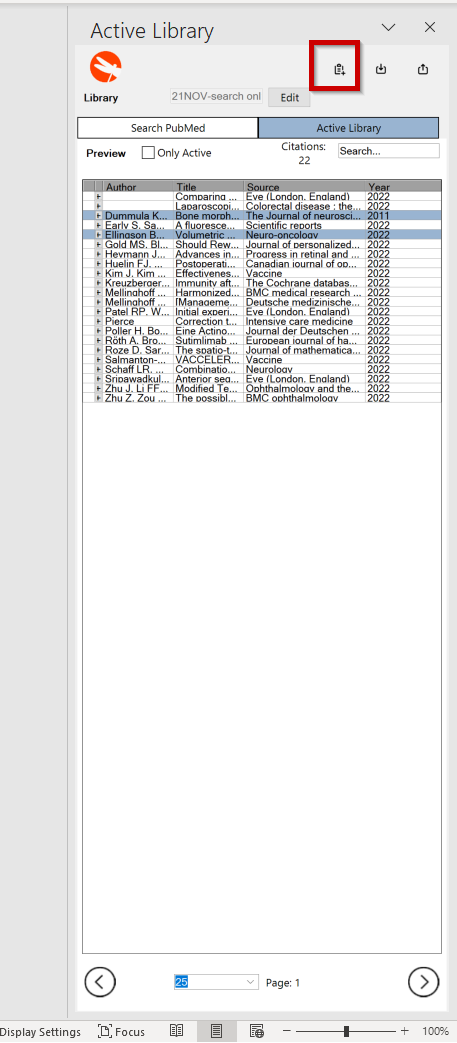
Custom Citations
To add a custom citation users can click on the Add custom Citation button found on the top of the Citation Panel.
When clicked the Custom Citation window will open which is where users can create their own custom citation.
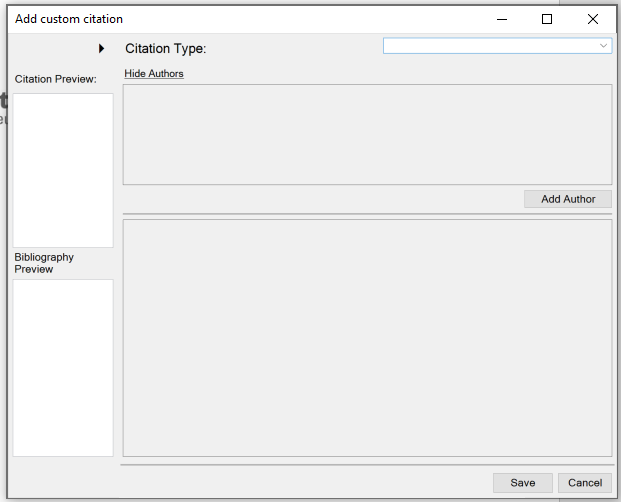
On the top most part of the window is a drop down menu where users can select what kind of citation source it is. Once a source is selected the bottom of the window will be filled with options relevant for that specified citation type.
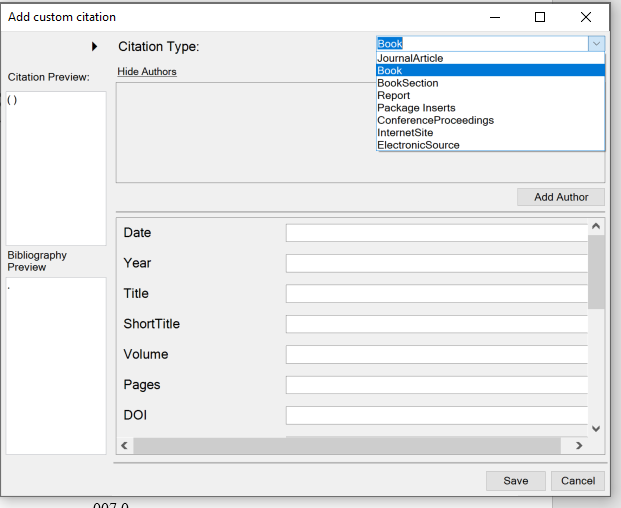
From there users can fill out the citation with the relevant data. Once finished, users can click Save to complete and the custom citation will be added to the document’s active library.
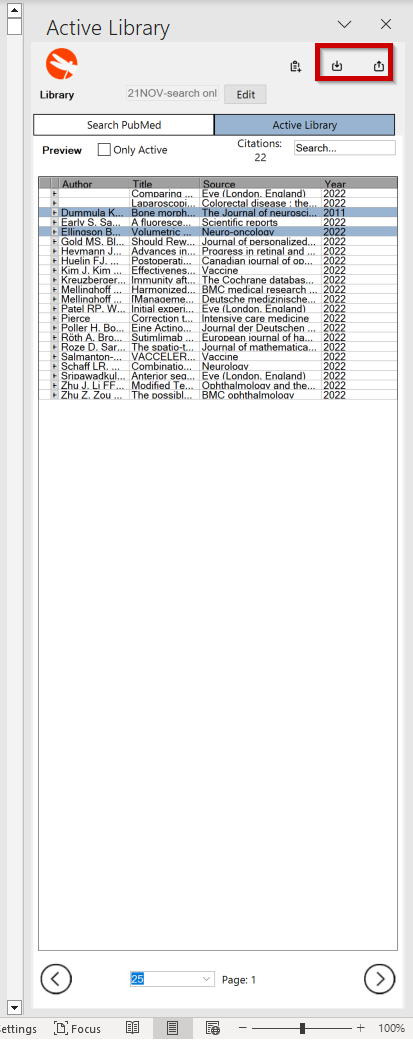
Import & Export
The Export tool allows users to export their Active Library from their local document into a saved file which can be imported using the Import tool into other documents.
Saving & Cloud Sync
Clicking the Save button found next to the library name will save the current library configuration to the AcuCite Database. If using a pre-existing library, clicking Edit and then Save will use the current active library configuration to update the pre-existing library’s settings.
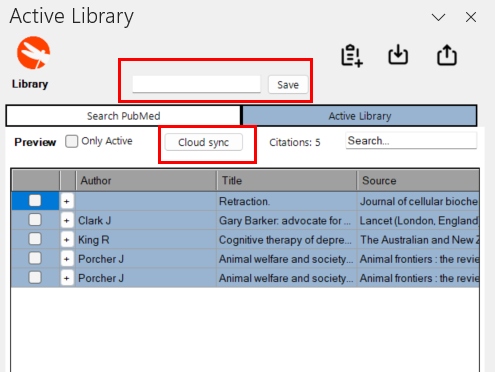
To Sync the current library with any changes made on the WebUI instead users can use the Cloud Sync button found in the image above.
It is highly recommended that users first cloud sync AND THEN save to the cloud as to not accidentally remove changes made possibly by other users if updating a pre-existing library.
Update Tool
Under the Acumen tab found in the top ribbon is a button called Updates, this button can be used to update your Acumen Tool set to the latest version available without needing to go to the acumen site and receive the latest version. You can see if there is a newer version available as well via the update icon found on the right side of the Citation Ribbon.


When clicked it will show you what version you’re on, the latest version and if you are not up to date an update button will be available from which you can click to start the update process.
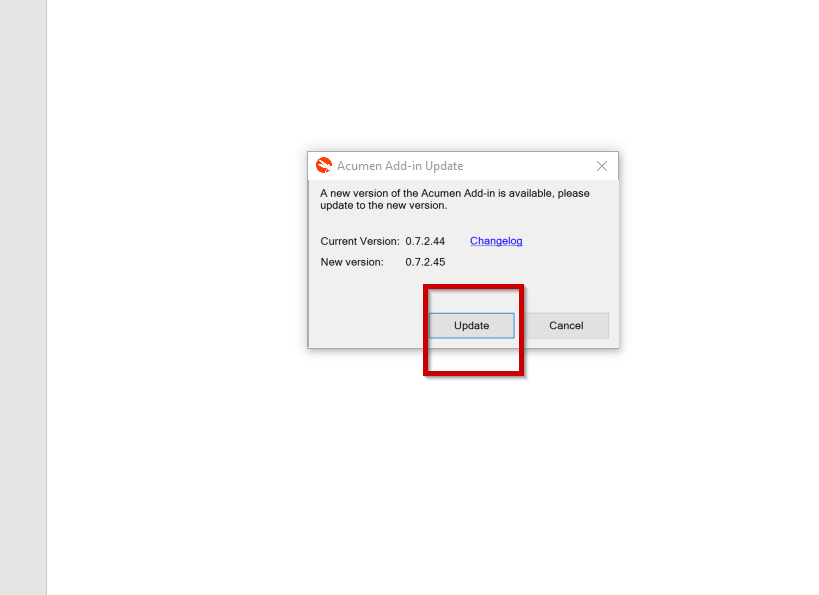
When the button is clicked it will open a installer wizard which you can follow to complete your update. Once done you can click Finish on the bottom of the window and now your tool set should be on the latest version.